Day 8 of Advent | Begin Preparing Christmas Brunch |

Christmas morning is a magical time filled with joy, excitement, and, of course, delicious food. Preparing brunch shouldn’t add stress to your holiday spirit. This year, why not embrace the joy of meal prepping with a traditional brunch menu that can be made ahead of time, frozen, and effortlessly reheated on Christmas Day? Here’s a delightful menu designed to take you from the oven to the table in under an hour so you can enjoy the festivities with family and friends around the tree.

Menu Highlights

  1. Savory Breakfast Casserole
  2. Cinnamon Rolls – Grocery Store Brand
  3. Cranberry Muffins
  4. Hot Chocolate
  5. Coffee Bar

1. Savory Breakfast Casserole

Ingredients:

  • 8 eggs
  • 1 cup milk
  • 1 cup shredded cheese (cheddar or your choice)
  • 1 pound breakfast sausage, cooked and crumbled
  • 1 cup diced bell peppers and onions
  • 1 bag of frozen hash browns
  • Salt and pepper to taste

Instructions:

  1. Preparation (Day Before): In a large mixing bowl, whisk together eggs and milk. Stir in cheese, sausage, bell peppers, onions, and hash browns. Season with salt and pepper. Pour into a greased baking dish.
  2. Cooking: Cover and refrigerate overnight. On Christmas morning, preheat your oven to 350°F (175°C). Bake uncovered for 30-35 minutes or until set. Let cool slightly before serving.

2. Cinnamon Rolls

Ingredients:

  • 1 tube of refrigerated cinnamon roll dough from the Grocery Store
  • 1/4 cup icing (included)

Instructions:

  1. Preparation (Day Before): Roll out cinnamon roll dough as directed on container
  2. Cooking: Place the rolls on a baking sheet and chill overnight. On Christmas morning, bake at 350°F (175°C) for 15-20 minutes. Drizzle with icing before serving.

3. Cranberry Muffins

Ingredients:

  • 2 cups all-purpose flour
  • 1 cup sugar
  • 1 tablespoon baking powder
  • 1/2 teaspoon salt
  • 1 cup milk
  • 1/2 cup vegetable oil
  • 1 egg
  • 1 cup fresh or frozen cranberries

Instructions:

  1. Preparation (Day Before): Combine flour, sugar, baking powder, and salt in a bowl. In another bowl, mix milk, oil, and egg. Stir the wet ingredients into the dry ones, then fold in cranberries. Pour into muffin tins.
  2. Cooking: Bake at 375°F (190°C) for 20-25 minutes until golden. Let cool completely, then freeze.

5. Hot Chocolate

Ingredients:

  • Hot chocolate mix
  • Milk
  • Cheese

Instructions:

  1. Setup (Day Before): Prepare the hot chocolate mix in a large pot. Place white cheese on a platter in the frigerator to add to the hot chocolate.
  2. Serving: On Christmas morning, heat the hot chocolate and let everyone add cheese if they want it.

Final Touches

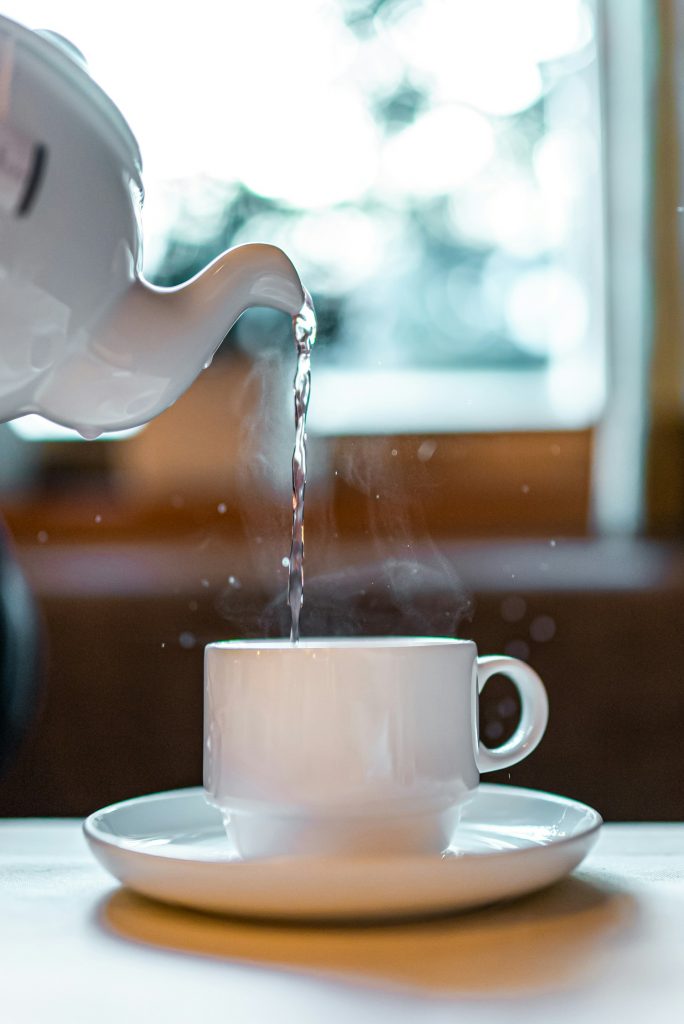
Set Up a Home Coffee Bar

Creating a cozy and functional home coffee bar can enhance your daily routine and impress guests. Follow these steps to set up an inviting coffee station that reflects your style and caffeine preferences!

1. Choose Your Location

  • Select a Space: Look for an area in your kitchen or a small corner in your living room. Ensure it’s easily accessible and has enough counter space for your coffee equipment.
  • Consider Lighting: Good lighting can elevate the ambiance. If possible, position your coffee bar near a window or add a stylish lamp.

2. Gather Your Essentials

Coffee Equipment:

  • Coffee Maker: Choose between a traditional drip coffee maker, French press, espresso machine, or pour-over setup based on your preferences.
  • Coffee Grinder: If you use whole beans, a grinder is essential. Burr grinders provide a more consistent grind.
  • Kettle: A good kettle, preferably with temperature control, is a must for brewing specialty coffees like pour-over or French press.

Coffee and Accessories:

  • Coffee Beans: Stock a variety of high-quality beans or ground coffee. Consider a mix of single-origin, blends, or seasonal flavors.
  • Filters: Keep a supply of coffee filters if using a drip coffee maker or pour-over.
  • Condiments: Provide sugar, sweeteners, creamers, and milk alternatives. Consider flavored syrups for a special touch.

3. Organize Your Space

  • Storage Solutions: Use jars or canisters for coffee beans and sugar. Labeling can help keep everything organized.
  • Shelving: Install shelves for coffee mugs, syrups, and other accessories. Display them aesthetically for easy access and a decorative touch.
  • Tray or Cart: A small tray or rolling cart can keep all your essentials together and make it mobile if necessary.

4. Personalize Your Bar

  • Mugs and Glassware: Select your favorite coffee mugs and cups. You can mix and match styles for a more eclectic look or stick to a cohesive theme.
  • Decor: Add personal touches, like a small plant, a framed photo, or a coffee-related quote on a chalkboard or print.
  • Coffee Art: If you enjoy latte art, consider investing in a milk frother and have some cocoa powder or cinnamon for decoration.

5. Create a Comfortable Atmosphere

  • Seating Area: If space allows, add a comfortable chair or stool. It encourages you to relax and savor your coffee.
  • Cozy Touches: Use an attractive tablecloth or runner, and consider candles for warmth and ambiance.

By planning and prepping these dishes ahead of time, you can enjoy a festive brunch that captures the spirit of Christmas without the hassle. Reheat the breakfast casserole and serve it alongside warm cinnamon rolls, muffins, and a warm cup of coffee or hot cocoa.

Day 6 of Advent : Create a Family Motto

Examples of Family Mottos

  1. “Structured for Success”
  2. “Rooted in Strength”
  3. “Adventure Awaits”
  4. “Together We Thrive”
  5. “Driven by Dreams”
  6. “Unity in Purpose”
  7. “Focus. Faith. Family.”
  8. “Atlanta Bound, Family Found”
  9. “Building Our Legacy”
  10. “Progress with Passion”
Inspiration for a Family Motto

Crafting Your Family Motto: A Fun One-Hour Activity

Creating a family motto is not just about words; it’s about encapsulating your family’s values, dreams, and aspirations into a phrase that resonates with everyone. It serves as a guiding light for your family and can be a powerful part of your family logo. Whether you’re looking to reaffirm your commitments to each other or define your collective identity, this engaging activity will help you craft a meaningful motto in just one hour!

Why a Family Motto Matters

A family motto can:

  • Unite: It creates a shared sense of purpose and belonging.
  • Inspire: It motivates everyone towards common goals.
  • Represent: It encapsulates your family’s unique character and values.

Preparation

Materials Needed:

  • Paper and pens or markers
  • A timer (or a phone to keep track of time)
  • A whiteboard or large sheet of paper (optional for group brainstorming)

Step-by-Step Activity

1. Introduction (5 minutes)

  • Gather everyone in a comfortable space where you can brainstorm freely.
  • Explain the purpose of the activity: to create a motto that reflects your family’s identity and values.

2. Brainstorming Session (15 minutes)

  • Divide into small groups or work as a whole family, depending on the size.
  • Encourage everyone to think of words or phrases that resonate with your family’s values.
  • Share ideas like the ten examples given:
    • “Structured for Success”
    • “Rooted in Strength”
    • “Adventure Awaits”
    • “Together We Thrive”
    • “Driven by Dreams”
    • “Unity in Purpose”
    • “Focus. Faith. Family.”
    • “Atlanta Bound, Family Found”
    • “Building Our Legacy”
    • “Progress with Passion”
  • Write down every idea—no matter how big or small!

3. Narrowing Down Choices (20 minutes)

  • After brainstorming, come together as a family.
  • Discuss the ideas presented and what resonates most with everyone.
  • Use this time to ask questions:
    • What does this motto mean to us?
    • How does it represent our family values?
  • Aim to narrow it down to your top three choices.

4. Final Selection (15 minutes)

  • Once you have your top three, take a vote to select the final family motto.
  • Discuss why the chosen motto speaks to your family. This will deepen the emotional connection to the phrase.

5. Create a Visual Representation (5 minutes)

  • If you have time, think about how the motto could be visually represented in your family logo.
  • Consider colors, fonts, or symbols that match the motto’s spirit.

By the end of this fun hour, you will have a unique family motto that encapsulates your collective identity, aspirations, and values. Display it proudly on your family logo or in your home as a daily reminder of what binds you together. Remember, a family motto is not just a few words; it’s a reflection of your family’s heart and soul!

Happy crafting, and may your new motto inspire joy and unity for years to come!

Dec 3 | Making Health Storey Candied Ginger & Health Storey Ginger Lemon Tea Syrup

Warm Up This Winter: Homemade Ginger Tea Syrup and Candied Ginger

When the winter chill sets in, there’s nothing quite like a cup of ginger tea to warm you up. Not only is it soothing, but it’s also packed with health benefits.

Why Ginger?

Ginger is renowned for its numerous health benefits, especially in the colder months. It’s an effective remedy for colds and flu, aids digestion, and has anti-inflammatory properties. Incorporating ginger into your diet during winter can help boost your immune system and keep you feeling energized.

Ingredients

For the Ginger Tea Syrup:

  • 3 cups fresh ginger, peeled and diced in small pieces
  • 1 cup sugar
  • 1 cup water
  • Zest of 3 lemons
  • 3 lemons
  • Zest of 1 orange

For the Candied Ginger:

  • Ginger pieces used from the syrup
  • Extra sugar for rolling

Instructions

Making the Ginger Tea Syrup

  1. Prepare your Ingredients: Start by peeling and dicing the ginger. Zest and peel the lemon and orange.
  2. Combine Ingredients: In a medium saucepan, combine the sliced ginger, sugar, and water. Stir well to dissolve the sugar.
  3. Simmer: Place the saucepan on the stove over medium heat and bring the mixture to a gentle simmer. Add the lemon and orange zest and lemon pieces.
  4. Cook: Allow the mixture to simmer for hours, stirring occasionally, until the syrup has thickened and turned a lovely golden brown.
  5. Cool and Store: Once you achieve the desired consistenc place the syrup in a canning jar and let the syrup cool before sealing it. Store it in the refrigerator, where it can last for up to two weeks. If you would like to store for a longer time, place the cooled syrup into ice cube trays and freeze.

Making Candied Ginger

  1. Roll in Sugar: While the ginger pieces are still slightly sticky from the syrup, roll them in sugar to coat thoroughly.
  2. Dry: Place the coated ginger pieces on a parchment-lined baking sheet and let them dry for a few hours at room temperature.
  3. Store: Once dried, store your candied ginger in an airtight container. Enjoy a few pieces a day as a sweet treat and immune booster!

Health Benefits of Ginger in Winter

  • Immune Booster: Rich in antioxidants, ginger helps strengthen the immune system, making it easier for your body to fight off colds and infections.
  • Soothing Digestive Aid: Ginger can alleviate nausea and promote healthy digestion, especially helpful after holiday feasting.
  • Anti-Inflammatory: Its anti-inflammatory properties can help relieve muscle pain and soreness during cold weather.

Enjoy Your Ginger Goodness!

With this ginger tea syrup and candies in your home, you’re armed with a delicious way to indulge and stay healthy this winter. Add a tablespoon of your syrup to a cup of hot water for a comforting tea, and snack on candied ginger as you enjoy the cozy vibes.

HappyAdvent Calender day 3!

Day 2 Advent | Making A vision Board for 2026 | Vision Board DIY

Creating a Vision Board for 2026: Focused Goals for Your Future

As we move forward into a new year, it’s the perfect time to create a vision board that embodies your dreams and aspirations for 2026. A vision board serves as a visual representation of your goals, helping to manifest your intentions and keep you motivated as you work towards achieving your dreams. In this blog post, we’ll explore how to create a vision board centered around three end-of-year goals and three short-term goals.

Why Vision Boards Work

Vision boards are more than just a collage of images; they serve as constant reminders of what you want to achieve and can inspire positive changes in your life. Research shows that visualization techniques can increase motivation, enhance goal commitment, and boost overall happiness. By placing your vision board in a prominent place, you’ll be reminded of your goals and the steps you need to take to achieve them.

Steps to Create Your Vision Board

1. Reflect on Your Goals

End-of-Year Goals:
First, identify three specific long-term goals you would like to achieve by the end of 2026. These goals should be ambitious yet realistic, serving as a guiding light for your journey. Consider areas such as:

  • Career Advancement: Aim for a specific position, salary, or project completion.
  • Health and Wellness: Think about weight loss, improved fitness levels, or mental well-being.
  • Personal Growth: Focus on areas like education, skills acquisition, or travel experiences.

Short-Term Goals:
Next, outline three short-term goals that can act as stepping stones toward your long-term aspirations. These goals should be achievable within the next few months and should be specific, measurable, and actionable. Examples include:

  • Networking: Attend a certain number of industry events or connect with a mentor.
  • Fitness: Commit to a consistent workout routine or take up a new sport.
  • Skill Development: Enroll in a course related to your career or a personal interest.

2. Gather Materials

To create your vision board, you’ll need:

  • A poster board or corkboard
  • Magazines, printed images, or quotes that resonate with your goals
  • Scissors and glue (or pins)
  • Markers or decorative items (stickers, washi tape, etc.)

3. Visualize Your Goals

As you gather images and words that inspire you, think about how each element relates to your goals. For each end-of-year goal, select visuals that embody what success looks like for you. For example, if your goal is to travel, find images of destinations you want to explore. For short-term goals, look for visuals that represent the actions you need to take.

4. Assemble Your Board

Once you have your materials, arrange them on your board in a way that feels visually appealing to you. You can organize by category (short-term vs. long-term) or create a more abstract design. As you place each item, take a moment to visualize yourself achieving that goal and the emotions you will feel.

5. Display Your Vision Board

Position your vision board in a place where you’ll see it daily—like your workspace, bedroom, or kitchen. This daily exposure will reinforce your intentions and keep your goals top-of-mind.

6. Review and Revise

Your vision board is not just a one-time project. As you progress through the year, take time to review your goals. Celebrate the achievements you’ve made and adjust your board as needed. If new goals arise or priorities shift, feel free to update your vision board to reflect your evolving aspirations.

Creating a vision board focused on three end-of-year goals and three short-term goals can be a powerful tool for manifestation. It allows you to visualize the future you desire, prioritize what truly matters, and stay motivated along your journey. As you embark on this creative endeavor, remember that your vision board serves as a reflection of your potential and aspirations. Here’s to a transformative 2026 filled with success, growth, and vitality! 🌟


By following these steps, you can create a vision board that not only enhances your focus on your goals but also inspires you every single day. Happy crafting!

Day 4 of Holiday Prep | Health Storey Holiday Prep |

Health Storey Holiday Prep: Establishing a Quiet Evening Routine for Success

The holiday season can be both joyous and hectic, filled with bustling activities, celebrations, and preparations that can leave you feeling overwhelmed. As you navigate through your to-do lists, it’s essential to incorporate a quiet evening routine to help you stay grounded, track your progress, and maintain a sense of calm amidst the holiday chaos. Here’s how to create an evening routine that sets you up for success.

Sitting down for a quiet evening chatting

Benefits of a Quiet Evening Routine

  1. Reflect and Review: Taking time each evening allows you to reflect on what you’ve accomplished, celebrate your wins, and identify any tasks that need attention.
  2. Reduce Stress: A calming evening routine can lower stress levels, helping you approach the next day with a fresh mindset.
  3. Promote Better Sleep: A serene winding-down period enhances relaxation, leading to improved sleep quality, which is crucial during the busy holiday season.

Creating Your Evening Routine

Here’s a simple yet effective routine to incorporate into your holiday prep:

1. Set a Consistent Time

Choose a specific time each evening to begin your quiet routine. This consistency signals to your mind and body that it’s time to unwind and reflect. For instance, aim for 7:30 PM or 8:00 PM, right after cleaning up the kitchen.

2. Create a Calming Environment

Make your space inviting and relaxing. Play calming music and turn off the computer and your phone. This atmosphere will help you sit down and review your achievements over the month and what you have left on your todo lists.

3. Journaling or Reflection

Spend 10-15 minutes journaling about your day:

  • What did you accomplish? List the tasks you’ve completed to see your progress visually.
  • What went well? Reflect on moments that brought you joy or satisfaction.
  • What still needs attention? Identify outstanding tasks or concerns and prioritize them for the following day.

4. Plan for Tomorrow

Dedicate a few minutes to outline your priorities for the next day. This could include last-minute shopping, meal prep, or wrapping gifts. Having a plan will reduce morning stress and keep you on track by having everything ready the day before.

5. Pre-Bed Relaxation

Engage in a calming activity to end the day. This could be reading a book or enjoying a warm cup of herbal tea. Aim to disconnect from screens at least 30 minutes before bedtime to promote better sleep.

6. Set Your Space for Tomorrow

As part of your routine, prepare your space for the next day. This could mean clearing your kitchen counter, laying out ingredients for breakfast, or organizing your holiday supplies. A tidy space reduces clutter and helps you start the day feeling organized.

Incorporating a quiet evening routine into your holiday prep can transform the way you experience this bustling season. By taking time to reflect, practice gratitude, and prepare for the day ahead, you’ll find yourself more centered and equipped to handle the joys and challenges of the holidays. Embrace this routine, and watch as it brings clarity and peace during a time that can often be chaotic.

Creating a Joke for Christmas Storey Time | Day 3 | Getting Ready for Christmas | Health Storey Holiday Prep |

Collecting Family Stories: A Fun and Meaningful Christmas Tradition

The holiday season is a time for celebration, connection, and, most importantly, sharing memories with loved ones. This Christmas, why not take a unique approach by collecting stories from each family member and presenting them on cards? It’s a delightful way to spark conversation, laughter, and warmth around the dinner table. Here’s how to create your own story cards, featuring both serious tales and light-hearted jokes!

Why Share Stories?

Stories have a magical way of connecting us. They can evoke nostalgia, foster understanding, and create laughter—making them a perfect addition to your holiday festivities. Sharing both serious and humorous stories will provide a rich tapestry of family history and playful banter, ensuring everyone feels included.


Step-by-Step DIY for Collecting and Sharing Stories

Step 1: Engage Family Members

  • Ask for Participation: Reach out to each family member, explaining your plan to collect stories. You can do this in person, via email, or with a fun group chat.
  • Set Guidelines: Request one serious story and one light-hearted story (that can be turned into a joke) from each person.

Step 2: Collecting the Stories

  1. Create a Simple Template:
  • You can provide family members with a simple structure to follow, such as:
    • Serious Story: A memory that holds significance—an impactful lesson, a family tradition, or a heartfelt moment.
    • Joke Story: A funny incident or mishap that can be framed as a light-hearted joke.
  1. Questions to Prompt Stories:
  • For Serious Stories:
    • “What’s a memorable moment from your childhood that shaped who you are today?”
    • “Can you share a meaningful lesson you learned from a tough experience?”
  • For Joke Stories:
    • “What’s a time you found yourself in a funny or awkward situation?”
    • “Have you ever tried cooking a holiday meal that didn’t go quite as planned?”
    • Ask permission from family member to use an embarrasing event to create a joke?

Step 3: Creating the Story Cards

  • Materials Needed:
  • Index cards or decorative cardstock
  • Markers, pens, or colored pencils
  • Optional: Stickers or washi tape for decoration
  • Design Your Cards:
  • Write the serious story on one side of the card and the joke or humorous story on the other side.
  • Add decorative elements for visual interest, like festive designs or family photos.

Step 4: Sharing at Christmas

  • Set the Scene:
  • During your Christmas gathering, create a special moment dedicated to storytelling. Gather everyone around, perhaps near the tree or the dinner table.
  • Pass Around the Cards:
  • Allow each family member to take turns reading their stories aloud. This not only facilitates conversation but also invites discussion about the memories shared.

Making a Family-Friendly Joke

Concept of The Joke:

  • Joke Format: “Have you heard the one about [insert setup]? Well, it happened when [insert punchline].”
  1. Identify the Setup:
  • Choose a humorous incident from your family joke story. For example, “Have you heard the one about Grandma’s famous fruitcake?”
  1. Craft the Punchline:
  • Create a light-hearted punchline that ties back to the setup. For example, “Well, it scared more people than the Grinch ever did!”
  1. Share the Joke:
  • Encourage everyone to work on their punchlines beforehand, allowing for some family-friendly competition and laughter!

This Christmas, collect and share stories that bring your family closer, filled with laughter and warmth. By introducing this fun DIY project, you’ll create a memorable tradition that sparks conversations and strengthens your family bonds. So gather those stories, craft your cards, and get ready for a joyful holiday season filled with love and laughter!

Create a Yearbook for 2025 | Day 2 of 28 Holiday Dash

Create a Cherished Family Tradition: DIY Year in Photos Book for Christmas

As the holiday season approaches, it’s the perfect time to reflect on the memories created throughout the year. What better way to preserve those moments than by creating a printed year-in-photos book that your family can cherish for years to come? This DIY project not only makes a thoughtful Christmas gift for each family member but also serves as a beautiful way to relive the special moments you’ve shared. Here’s how to prepare for this festive project!

Why Create a Year in Photos Book?

A printed photo book is a timeless keepsake that allows family members to relive memories, share stories, and feel connected to one another. As you gather with loved ones this Christmas, flipping through the pages will invoke nostalgia and spark laughter, making it a wonderful holiday tradition.


Steps to Create Your Year in Photos Book

1. Gather Your Photos

Start by collecting photos from the entire year. Options for sources include:

  • Family vacations
  • Birthdays and celebrations
  • Everyday moments and milestones

2. Choose a Printing Service

Here are some popular places where you can print your photo book:

  • Shutterfly: Known for a wide variety of customizable options.
  • Mixbook: Offers beautiful design templates and easy-to-use software.
  • Snapfish: Often runs promotions for discounted photo books.
  • Blurb: Great for more extensive projects with customizable formats.

3. Understand the Pricing

  • 52-Page Book: Prices typically range from $25 to $50, depending on the printing service and any additional features (like hardcovers).
  • 100-Page Book: Prices can range from $45 to $100, again depending on the printing service and format.

4. Timeframe to Print

  • Most services offer delivery timelines of 1-2 weeks; however, during the holiday rush, it can take longer. Make sure to account for this and order well in advance!

5. Set Up Your Book

Once you’ve selected a printing service, you can usually create your book directly on their website. Here’s how to set it up:

  • Choose a Template: Most printing services offer a variety of templates; select one that resonates with your family’s style.
  • Organize Your Photos: Decide how you’d like to categorize the photos—by month, event, or family member.
  • Layout Each Page: Utilize the templates to create uniformity. You can often add text, captions, and stickers.

Template Ideas for Each Page:

  • Cover Page: Year title, family name, and a highlight photo.
  • Monthly Spreads: 2-4 photos per month with space for titles and captions summarizing key events.
  • Special Events Pages: Dedicated pages for birthdays, holidays, and family gatherings, allowing for more photos and detailed stories.

6. Final Touches

Before you print, double-check for any typos, and ensure the photo quality is high enough to look great in print.


Gift-Giving for Christmas

Once your book is printed, wrap each copy in festive paper or share them with family members during your Christmas gathering as a family yearbook and let them add notes. This thoughtful gift not only serves as a memento but also reinforces family ties and memories.

Creating a year-in-photos book is a rewarding DIY project that captures the essence of your family’s journey throughout the year. With careful planning and a little creativity, you’ll have a beautiful keepsake that everyone will treasure for years to come. Happy crafting, and may your holidays be filled with love and joyful memories!

Mocktails & Cocktails| Christmas Dash Day 1 of 28 | Health Storey Holiday Prep | Get Ready for the Christmas Holiday Dash!

As the holiday season approaches, the excitement builds! From Black Friday shopping to Christmas Day celebrations, it’s a magical time filled with gatherings, joy, and festive cheer. To help you navigate this jubilant journey, we’re rolling out the Christmas 28 Day Holiday Dash—your go-to guide for making the most of this delightful season!

Kicking off our dash on Day 1, we’re diving into the world of beverages with a curated list of festive mocktails and cocktails. Whether you’re hosting a holiday party, cozying up with close friends, or simply seeking a refreshing drink to enjoy, having the right ingredients on hand is essential.

To get you started, we’ve compiled 5 fabulous Christmas cocktails that easily transform into mocktails, ensuring everyone can join in on the festivities. So gather your ingredients, mix up some holiday magic, and let’s toast to the most wonderful time of the year! Cheers!

Cocktail Recipes for the Holidays

Here are 5 delightful Christmas cocktail recipes that can easily be transformed into refreshing mocktails!

1. Cranberry Spritzer

Ingredients:

  • 1 cup cranberry juice
  • 1/2 cup club soda or sparkling water
  • 1 tablespoon lime juice
  • Fresh cranberries and lime slices for garnish

Instructions:

  1. In a glass, combine cranberry juice and lime juice.
  2. Top with club soda or sparkling water.
  3. Garnish with fresh cranberries and a lime slice.

Mocktail Option: Use the same ingredients, just omit any alcohol.


2. Pineapple Ginger Cocktail

Ingredients:

  • 1 cup pineapple juice
  • 1 tablespoon ginger syrup (or fresh grated ginger)
  • 1 ounce vodka (optional)
  • Fresh mint leaves for garnish
  • Ginger ale or soda water

Instructions:

  1. Mix pineapple juice, ginger syrup, and vodka (if using) in a shaker with ice.
  2. Shake well and pour into a glass.
  3. Top with ginger ale or soda water and garnish with mint leaves.

Mocktail Option: Skip the vodka and use all pineapple juice for a deliciously refreshing drink.


3. Festive Pomegranate Mule

Ingredients:

  • 1 ounce vodka (optional)
  • 1/2 cup pomegranate juice
  • 1/4 cup ginger beer
  • Fresh pomegranate seeds and lime for garnish

Instructions:

  1. In a glass, combine pomegranate juice and vodka (if using).
  2. Add ginger beer and stir gently.
  3. Garnish with fresh pomegranate seeds and a lime slice.

Mocktail Option: Omit the vodka, and enjoy the vibrant flavors of pomegranate and ginger beer.


4. Holiday Eggnog

Ingredients:

  • 2 cups milk (or almond milk)
  • 1 cup heavy cream (or coconut cream)
  • 3/4 cup eggnog mix
  • 1/2 teaspoon nutmeg
  • 1 ounce rum (optional)

Instructions:

  1. In a pitcher, whisk together milk, cream, eggnog mix, and nutmeg until well combined.
  2. Pour into glasses and add rum if desired.
  3. Sprinkle with additional nutmeg for garnish.

Mocktail Option: Just leave out the rum for a creamy and festive treat.


5. Spiced Apple Cider Fizz

Ingredients:

  • 1 cup apple cider
  • 1 tablespoon cinnamon syrup (or ground cinnamon)
  • 1 ounce whiskey (optional)
  • Club soda
  • Apple slices and a cinnamon stick for garnish

Instructions:

  1. In a glass, combine apple cider and cinnamon syrup.
  2. Add whiskey if using, and stir gently.
  3. Top with club soda and garnish with apple slices and a cinnamon stick.

Mocktail Option: Omit the whiskey for a warming, festive sip.


These cocktails and mocktails will surely add a festive touch to your holiday celebrations. Enjoy mixing and matching, and may your Christmas be filled with joy and cheer! Cheers! 🍹✨

Plan on Seeing a Holiday Play|34 of 60 Holiday Prep

Here’s a step-by-step plan for your holiday theatre outing, focusing on maximizing your experience:

Day Planning for Theatre Outing

1. Choose the Performance

  • Select a Show: Research the holiday theatre productions available in November and December. Consider classics like “A Christmas Carol” or “The Nutcracker,” or look for local community productions.
  • Check Reviews: Read reviews to ensure it’s a performance you’ll enjoy.

2. Gather Company

  • Invite Friends: Reach out to friends who enjoy theatre. Ask who would like to join you.
  • Use Meetup: If you don’t find a suitable group, check Meetup.com for local theatre enthusiasts or events.

3. Purchase Tickets

  • Book Early: Once you have your group, decide on a date and purchase tickets. Popular shows can sell out quickly, so aim to book as soon as possible.
  • Consider Discounts: Check for group discounts or any promotional codes.

4. Plan the Day

  • Choose a Dinner Time:
    • Pre-Show Dinner: Aim to have dinner about 1.5 to 2 hours before the show starts. This gives you enough time to eat and arrive at the theatre comfortably.
    • Restaurant Selection: Choose a restaurant nearby the theatre to minimize travel time. Make a reservation if needed.
  • Travel Plan:
    • Decide on Transport: Will you be driving or taking public transport? Consider traffic and parking if driving.
    • Meet-up Point: Agree on a meeting point and time with your friends to ensure everyone arrives together.

5. Evening Schedule

  • 6:00 PM – Dinner: Enjoy a leisurely meal and discuss the upcoming show to build excitement.
  • 7:30 PM – Head to Theatre: Leave the restaurant by this time to allow for travel and any unexpected delays.
  • 8:00 PM – Show Start: Arrive a little early to find your seats and settle in.

6. Post-Show Plans

  • Discussion: Plan to grab dessert or a drink after the show to discuss your thoughts on the performance.
  • Photos: Take a group photo in front of the theatre as a memento of the night.

7. Final Touches

  • Dress Code: Check if the theatre has a dress code. Dress comfortably yet stylishly for the evening.
  • Refreshments: If allowed, pack a small snack or drink for the journey, especially if it’s a long day.

Additional Tips

  • Timing: Reconfirm showtimes and restaurant reservations a few days before.
  • Entertainment: Consider browsing theatre-themed podcasts or articles to enhance your experience.

Following this plan will help you enjoy a memorable night at the theatre, surrounded by good company and festive vibes!

Time to Make a Gingerbread House | Plan on Moving to a New Apartment | Day 33 of 60 Holiday Prep

Day 33: Gingerbread House and Moving Plans

As you dive into the holiday spirit with the idea of making a gingerbread house, it’s also a great time to think about your living situation. Whether you own or rent, think about whether your current home makes you happy. If you’re considering a move, it’s helpful to get organized!

Not ready to make a gingerbread house? Start looking for a house or a new apartment

Moving Checklist

Here’s a comprehensive list of everything you need to consider, along with budgeting tips for moving into a new apartment or house.


Moving Checklist

1. Budgeting for the Move

  • First Month’s Rent: Typically the cost of the first month before moving in.
  • Security Deposit: Usually 1-2 months’ rent.
  • Moving Expenses:
  • Moving truck rental
  • Packing supplies (boxes, tape, bubble wrap)
  • Professional movers (if applicable)
  • Utilities Setup: Potential service fees for water, gas, electric, internet, etc.
  • Renter’s Insurance: Monthly or yearly cost for coverage.
  • Miscellaneous: Emergency fund for unexpected costs.

2. Ideal Timing

  • Best Month to Look for an Apartment/House:
  • January: Many people move over the holidays, leading to a higher availability of listings in January.
  • Best Month to Move:
  • May-August: Summer is peak moving season due to better weather, school schedules, and increased job relocations. However, consider potential price fluctuations due to demand.

What to Consider When Apartment Shopping

1. Location

  • Proximity to work, schools, public transport, and amenities.

2. Size and Layout

  • Number of bedrooms/bathrooms.
  • Open vs. closed floor plans.

3. Amenities

  • In-unit laundry?
  • Gym, pool, or communal spaces?
  • Parking availability.

4. Lease Terms

  • Length of the lease (12 months, 6 months, etc.).
  • Flexibility and renewal options.

5. Pet Policies

  • If you have pets, consider places that allow them and note any fees or deposits.

Preparing for the Move

  • Declutter: Go through belongings and decide what to keep, donate, or throw away.
  • Pack in Stages: Start packing non-essential items weeks in advance.
  • Label Boxes: Clearly label boxes by room and contents for easier unpacking.

Final Thoughts

Whether you’re making a whimsical gingerbread house or contemplating a new living space, planning and organization are key. Dive into apartment hunting if you’re not happy with your current home—your ideal space is waiting. Happy building and moving!