Prepare Stockings and Begin Decorating| Day 19 of 60 | Holiday Prep

The Joy of Christmas Stockings: A DIY Guide to Creating Your Own

As the holiday season approaches, one of the most cherished traditions is hanging Christmas stockings. These festive decorations not only add to the holiday spirit but also serve as a delightful way to surprise loved ones with small gifts and treats. In this blog post, we’ll explore the history of Christmas stockings, provide a step-by-step guide on how to make your own, and share ideas on what to fill them with, when to fill them, who gets a stocking, and where to hang them if you don’t have a fireplace.

A Brief History of Christmas Stockings

The tradition of hanging stockings dates back to the 4th century and is often associated with the legend of St. Nicholas. According to the story, St. Nicholas secretly provided gifts to a poor family by dropping gold coins down their chimney, which landed in the stockings that were hung by the fire to dry. Over the years, this practice evolved into the festive custom we know today, where stockings are filled with small gifts and treats on Christmas Eve.

DIY Christmas Stocking Instructions

Creating your own Christmas stocking is a fun and creative project that can be enjoyed by the whole family. Here’s a simple step-by-step guide to making a personalized stocking:

Materials Needed:

  • Felt or fabric (red, green, or any festive color)
  • Scissors
  • Sewing machine or needle and thread
  • Fabric glue (optional)
  • Ribbon or embellishments (optional)
  • A stocking template (you can find printable templates online)

Instructions:

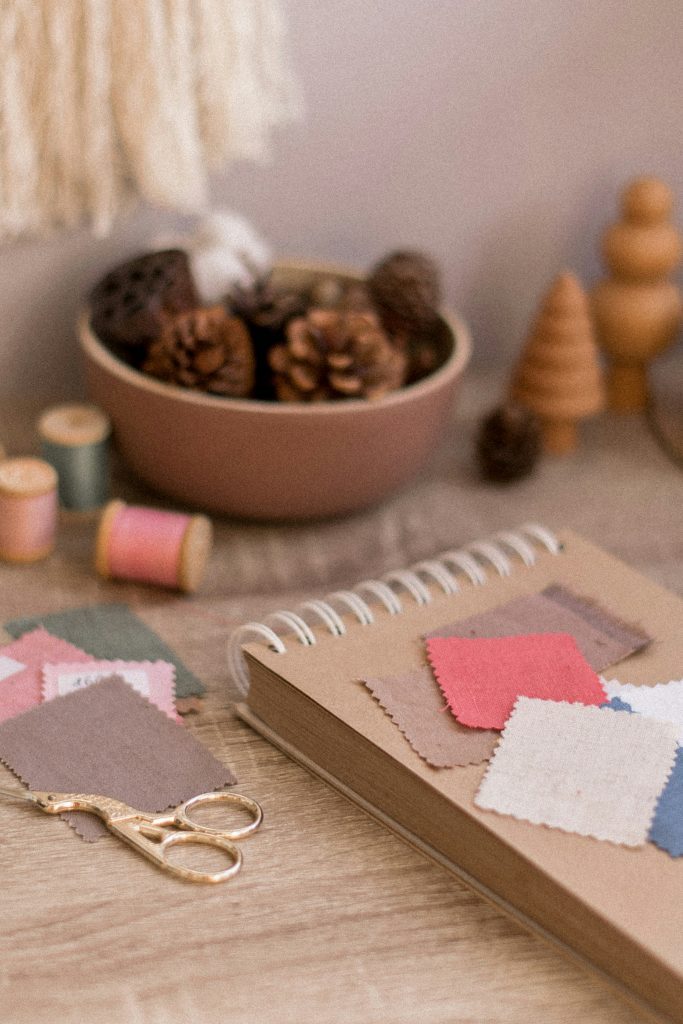
  1. Choose Your Fabric: Select a fabric that reflects your style. Felt is a great option for beginners as it doesn’t fray and is easy to work with.
  2. Cut the Fabric: Using your template, cut out two identical pieces of fabric for the front and back of the stocking. You can also cut out a contrasting piece for the cuff.
  3. Decorate: Before sewing, consider decorating your stocking. You can add names, patterns, or festive designs using fabric paint, glitter, or additional fabric pieces.
  4. Sew the Stocking: Place the two pieces of fabric together, with the right sides facing each other. Sew around the edges, leaving the top open. If you’re using a sewing machine, a straight stitch works well. If sewing by hand, use a simple running stitch.
  5. Add the Cuff: If you’re using a contrasting cuff, sew it to the top of the stocking now. Fold it down to create a decorative edge.
  6. Turn It Inside Out: Carefully turn the stocking right side out. Use a pencil or a chopstick to push out the toe and heel for a nice shape.
  7. Add a Loop: Cut a small piece of ribbon or fabric, fold it in half, and sew it to the top of the stocking to create a hanging loop.
  8. Final Touches: Add any final embellishments or decorations to make your stocking unique.

What to Put in Stockings

When it comes to filling stockings, the possibilities are endless! Here are some classic and creative ideas:

  • Candy and Treats: Chocolate, candy canes, and holiday-themed sweets are always a hit.
  • Small Toys: Consider adding small toys or games for children.
  • Personalized Gifts: Items like keychains, ornaments, or custom-made gifts can add a personal touch.
  • Practical Items: Fun socks, toiletries, or stationery can be both useful and enjoyable.
  • Gift Cards: A small gift card to a favorite store or coffee shop is a great surprise.

When to Fill Stockings

Traditionally, stockings are filled on Christmas Eve, often after the children have gone to bed. This adds an element of surprise and excitement for Christmas morning. Some families choose to fill them earlier in December as part of their holiday celebrations.

Who Gets a Stocking?

Stockings can be made for everyone in the family, including pets! It’s a wonderful way to include everyone in the festivities. You can also create stockings for friends or neighbors as a thoughtful gesture.

Where to Put Stockings Without a Fireplace

If you don’t have a fireplace, don’t worry! Here are some creative alternatives for hanging stockings:

  • On a Staircase: If you have stairs, hang stockings on the banister for a charming display.
  • Wall Hooks: Use decorative hooks on the wall to hang stockings.
  • Christmas Tree: Hang smaller stockings on the branches of your Christmas tree for a whimsical touch.
  • Shelves or Mantels: If you have shelves or a mantel, these can be perfect spots for displaying stockings.

Christmas stockings are a delightful tradition that brings joy and excitement to the holiday season. By creating your own stockings and filling them with thoughtful gifts, you can make this festive custom even more special. Whether you hang them by the fireplace or find a creative alternative, stockings are sure to bring smiles to your loved ones’ faces.

Happy crafting for a Merry Christmas!

NOTE: I bought my stocking. If you are busy and don’t want to be crafty, you can purchase one at a craft store, at a home goods store or online. My stocking,purchased this year for my new apartment, cost under twenty dollars.
6 Weeks Until Christmas! Day – Day 18 of 60 Days of Preparing for Thanksgiving and Christmas

Note: There are 6 Weeks and 46 days until Christmas. When we reach December 1, 2025 An Advents post title will be used on the blog. Please do not stress, it is still the same Holiday prep.

Note: 24 days before Christmas the Holiday Dash becomes an advents calendar. If you are starting the Holiday prep today, skip the non essentials and ask someone else to focus on Thanksgiving if you are not ready for the party. 60 Day dash refers to the holiday season not the days before Christmas. There are 46 days before Christmas.


Creating Stunning Holiday Centerpieces for Your Kitchen Counter

The holiday season is a time for gathering, celebration, and creating memories with loved ones. One of the best ways to set the mood for these festive occasions is by decorating your space with beautiful centerpieces. Whether you’re hosting a holiday dinner or simply want to add some cheer to your kitchen counter, a well-designed centerpiece can elevate your decor. In this blog post, we’ll explore the importance of size and height limitations for centerpieces and provide DIY instructions for two distinct styles: a formal centerpiece and an urban-inspired one.

The Perfect Centerpiece for the Space

When designing a centerpiece, it’s essential to consider its size and height. A centerpiece that is too tall can obstruct views and conversations, making it difficult for guests to engage with one another. A centerpiece that is too small may get lost on a large table. If your centerpiece looks too small make an arrangement of three centerpieces to keep the decorations balanced.

For kitchen counters, where space is often limited, it’s crucial to create a centerpiece that complements the area without overwhelming it. Aim for a height that allows for easy eye contact across the table while still being visually interesting – striking. A good rule of thumb is to keep your centerpiece between 12 to 24 inches in height and ensure it doesn’t take up more than one-third of the table’s width.

DIY Centerpiece Ideas

1. Formal Holiday Centerpiece

Materials Needed:

  • A medium-sized decorative bowl or vase
  • Fresh or faux flowers (e.g., white roses, red poinsettias, or evergreen sprigs)
  • Seasonal fruits (e.g., apples, oranges, or pomegranates)
  • LED Candles (preferably unscented)
  • Decorative ribbon or twine
  • Floral foam (optional)

Instructions:

  1. Prepare the Base: Start by placing your decorative bowl or vase in the center of your kitchen counter. If using floral foam, soak it in water and place it inside the bowl to help keep your flowers fresh.
  2. Arrange the Flowers: Trim the stems of your flowers to varying lengths and arrange them in the bowl. Start with the larger blooms at the back and fill in with smaller flowers towards the front. If using floral foam, insert the stems into the foam for stability.
  3. Add Seasonal Fruits: Tuck in seasonal fruits around the flowers for a pop of color and texture. This not only adds visual interest but also brings a natural element to your centerpiece.
  4. Incorporate Candles: Place a few unscented candles of varying heights around the arrangement. This will create a warm, inviting glow during your holiday gatherings.
  5. Finish with Ribbon: Tie a decorative ribbon or twine around the base of the bowl for an added touch of elegance.

2. Urban-Inspired Centerpiece

Materials Needed:

  • A shallow wooden tray or rustic platter
  • Potted plants
  • Decorative stones or pebbles
  • LED lights
  • Ornaments or holiday-themed decor

Instructions:

  1. Set the Base: Place your wooden tray or rustic platter on the kitchen counter. This will serve as the foundation for your urban centerpiece.
  2. Arrange the Plants: Position the potted plants on the tray. Vary the heights and sizes for a more dynamic look.
  3. Add Decorative Stones: Fill in the gaps with decorative stones or pebbles to create a natural, earthy feel. This will also help anchor the plants in place.
  4. Incorporate String Lights: Drape the lights around the plants and stones. This will emphasize and may add a focal point to the display.
  5. Finish with Ornaments: Scatter a few ornaments in the greenery for a festive flair.

Creating a holiday centerpiece for your kitchen counter can be a fun and rewarding DIY project. Enhance your space without overwhelming it and add the holidays to your living space. Whether you opt for a formal centerpiece or something trendy and urban-inspired, these centerpieces will bring joy and the holiday spirit to your holiday celebrations. Happy decorating!

Start Buying Holiday Craft Supplies | Day 11 of 60 Day Holiday Prep for Thanksgiving and Christmas

Setting Up Basic Craft Supplies for Your 60-Day Holiday Prep

The holiday season is just around the corner, and now is the perfect time to start preparing for all those festive DIY projects! Whether you’re planning to create handmade gifts, decorations, or cards, having the right craft supplies on hand will make your holiday prep a breeze. Today marks the beginning of your 60-day countdown to the holidays, so let’s dive into the essential craft supplies you’ll need and some simple DIY projects that even the least crafty among us can tackle.

Essential Holiday Craft Supplies

Before you hit the stores or shop online, here’s a comprehensive list of basic craft supplies to gather:

  1. Paper Supplies:
  • Cardstock (various colors)
  • Wrapping paper
  • Tissue paper
  • Craft paper (for scrapbooking)
  1. Adhesives:
  • Glue sticks
  • Liquid glue
  • Double-sided tape
  • Hot glue gun and glue sticks
  1. Tools:
  • Scissors
  • Craft knife
  • Ruler
  • Cutting mat
  1. Decorative Supplies:
  • Ribbons and twine
  • Stickers and embellishments
  • Washi tape
  • Glitter and sequins
  1. Painting Supplies:
  • Acrylic paints
  • Paintbrushes (various sizes)
  • Sponges for texture
  1. Fabric and Textiles:
  • Felt sheets
  • Cotton fabric (for sewing projects)
  • Embroidery thread
  1. Miscellaneous:
  • Holiday-themed stencils
  • Craft foam sheets
  • Beads and buttons
  • Holiday-themed cookie cutters

Simple DIY Projects for Non-Crafters

If you’re not particularly crafty but still want to create something beautiful for the holidays, here are three simple DIY projects that require minimal skills but yield stunning results:

  1. Holiday Mason Jar Gifts:
  • Supplies Needed: Mason jars, hot cocoa mix, marshmallows, chocolate chips, ribbons.
  • Instructions: Layer the hot cocoa mix, marshmallows, and chocolate chips in the mason jar. Seal it and decorate the jar with a festive ribbon. Attach a tag with instructions for making the perfect cup of cocoa!
  1. DIY Holiday Ornaments:
  • Supplies Needed: Clear glass or plastic ornaments, paint, glitter, and ribbon.
  • Instructions: Remove the top of the ornament and pour in a small amount of paint. Swirl it around to coat the inside, then add glitter for extra sparkle. Replace the top and hang a ribbon for a beautiful ornament that adds a personal touch to your tree.
  1. Personalized Gift Tags:
  • Supplies Needed: Cardstock, scissors, hole punch, and decorative elements (stickers, stamps).
  • Instructions: Cut the cardstock into tag shapes and punch a hole at the top. Decorate with stickers or stamps, and write the recipient’s name on each tag. These personalized touches will make your gifts stand out!

Conclusion

With your basic craft supplies gathered and a few simple projects in mind, you’re well on your way to a festive and creative holiday season. Remember, the key to enjoying your holiday prep is to have fun and let your creativity shine. So, grab your shopping list, head out to gather your supplies, and get ready to craft your way through the holidays! Happy crafting!

Below is a Checklist you can use for shopping:

Holiday Craft Supply Essential Deluxe Checklist

Use this handy checklist to ensure you have all the essential supplies for your holiday crafting projects.

  • [ ] Cardstock (various colors)
  • [ ] Wrapping paper
  • [ ] Tissue paper
  • [ ] Craft paper (for scrapbooking)
  • [ ] Holiday-themed scrapbook paper
  • [ ] Glue sticks
  • [ ] Liquid glue
  • [ ] Double-sided tape
  • [ ] Hot glue gun
  • [ ] Hot glue sticks
  • [ ] Scissors
  • [ ] Craft knife
  • [ ] Ruler
  • [ ] Cutting mat
  • [ ] Hole punch
  • [ ] Ribbons (various colors and widths)
  • [ ] Twine
  • [ ] Stickers (holiday-themed)
  • [ ] Washi tape
  • [ ] Glitter
  • [ ] Sequins
  • [ ] Beads
  • [ ] Acrylic paints (various colors)
  • [ ] Paintbrushes (various sizes)
  • [ ] Sponges (for texture)
  • [ ] Felt sheets (various colors)
  • [ ] Cotton fabric (for sewing projects)
  • [ ] Embroidery thread
  • [ ] Fabric scissors
  • [ ] Holiday-themed stencils
  • [ ] Craft foam sheets
  • [ ] Holiday-themed cookie cutters
  • [ ] Clear plastic or glass ornaments (for DIY projects)
  • [ ] Mason jars (for gift projects)
  • [ ] Craft storage bins or boxes
  • [ ] Ziplock bags (for small items)
  • [ ] Labels (for organizing supplies)
  • [ ] Notebooks or sketchpads (for planning projects)
  • [ ] Markers or pens (for writing and decorating)
  • [ ] Holiday-themed templates or printables (for inspiration)

Feel free to print this checklist or keep it handy on your phone as you shop for your holiday crafting supplies. Happy crafting!

DIY: Create Your Advent’s Calendar | Day 10 of 60 | Preparing for the Holidays

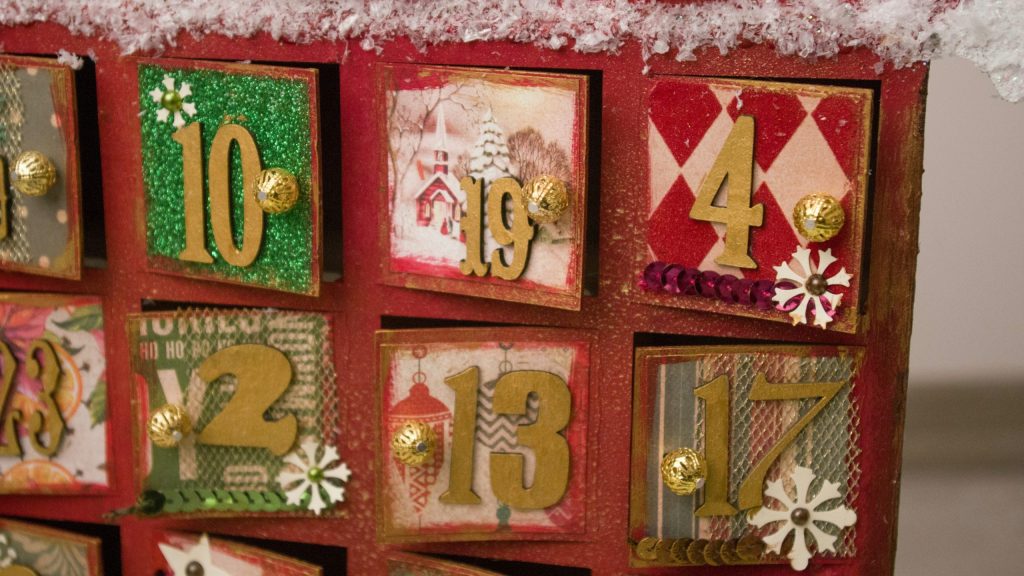
Advents Calendars don’t have to be filled with chocolate or bought in the store

Crafting Your Own Advent Calendar: Creative Ideas and Gift Suggestions

The holiday season is a time for joy, celebration, and anticipation, and what better way to count down the days to Christmas than with a DIY advent calendar? While traditional calendars often feature chocolates or candies, you can get creative and design one that suits your style and preferences. Whether you choose to use envelopes, boxes, or bags, the possibilities are endless! Here’s how to create your own advent calendar and some thoughtful gift ideas to include.

1. Creating an Advent Calendar with Envelopes

Using envelopes is a simple and versatile way to create an advent calendar. Here’s how to do it:

Materials Needed:

  • 24 small envelopes (you can decorate them with festive designs)
  • String or ribbon for hanging
  • Clothespins or tape
  • Small gifts or notes to fill the envelopes

Instructions:

  1. Decorate the Envelopes: Use markers, stickers, or washi tape to personalize each envelope. Number them from 1 to 24 for the days leading up to Christmas.
  2. Fill the Envelopes: Instead of sweets, consider filling each envelope with small gifts, notes, or even cash. For example, I created an advent calendar filled with money to spend after Christmas on holiday shopping. This gives me extra spending money for post-holiday sales and avoids the temptation of extra chocolates or candies in the house.
  3. Display Your Calendar: Hang the envelopes on a string or ribbon using clothespins, or arrange them on a shelf or table for easy access.

2. Creating an Advent Calendar with Boxes

If you prefer a more structured approach, using small boxes can be a fun way to create your advent calendar.

Materials Needed:

  • 24 small boxes (you can use gift boxes, matchboxes, or even repurpose small containers)
  • Decorative paper or wrapping for the boxes
  • Number stickers or tags
  • Small gifts or treats to fill the boxes

Instructions:

  1. Wrap the Boxes: Decorate each box with festive wrapping paper or paint. Number them from 1 to 24.
  2. Fill the Boxes: Choose a variety of small gifts, such as mini candles, ornaments, or beauty products. You can also include handwritten notes with fun activities or experiences to enjoy during the holiday season.
  3. Arrange the Boxes: Stack the boxes in a pyramid shape, line them up on a shelf, or create a festive display on your dining table.

3. Creating an Advent Calendar with Bags

Using small bags is another creative option for your advent calendar. This method is especially great for a more casual and playful look.

Materials Needed:

  • 24 small bags (paper, fabric, or burlap bags work well)
  • Twine or string for hanging
  • Number tags or stickers
  • Fun gifts or surprises to fill the bags

Instructions:

  1. Decorate the Bags: Use tags or stickers to number each bag from 1 to 24. You can also personalize them with festive designs or names.
  2. Fill the Bags: Consider including a mix of small gifts, such as tea bags, handmade coupons for activities, or even a few holiday-themed items like ornaments or decorations.
  3. Display the Bags: Hang the bags on a string or arrange them in a basket for a charming display.

Creating your own advent calendar is a wonderful way to add a personal touch to your holiday season. Whether you choose to use envelopes, boxes, or bags, the key is to fill them with thoughtful gifts. By customizing your advent calendar, you can make the countdown to Christmas even more special, all while avoiding the extra calories that often come with traditional calendars. So gather your materials, get creative, and enjoy the process of crafting a unique advent calendar that reflects your style and spirit! Happy holidays!

Start Shopping for Gifts | Day 8 of 60 | Health Storey Holiday Prep for Thanksgiving and Christmas

10 Tips and Tricks for Staying Focused on Your Christmas Gift List and Budget

The holiday season is just around the corner, and with it comes the joy of gift-giving! However, the excitement can quickly turn into stress if you’re not careful. To help you navigate the bustling world of Christmas shopping this November, Health-Storey has compiled ten essential tips and tricks to keep you focused on your gift list and budget. Let’s make this holiday season merry and bright without breaking the bank!

Gifts do not need to be complicated. A tray or bag of Holiday cookies is an excellent gift for every one.

1. Create a Detailed Gift List

Start by making a comprehensive list. Include their interests, sizes, and any specific items they might like. This will not only help you stay organized but also prevent impulse buys that can derail your budget.

2. Set a Realistic Budget

Determine how much you can afford to spend on gifts this year. Break it down by person or category, and stick to this budget as you shop. Having a clear financial plan will help you avoid overspending and keep your holiday spirit intact. If you are not happy about this year’s budget, start making a plan for the 2026 holidays and focus your budget this year on a specific gift theme that is more modest.

3. Prioritize Your List

Identify who is most important to you and prioritize your gift list accordingly. Focus on finding meaningful gifts for those at the top of your list first, and then work your way down. This ensures that you allocate your budget wisely.

4. Take Advantage of Sales and Discounts

November is packed with sales events, including Black Friday and Cyber Monday. Keep an eye out for discounts on items on your list. Sign up for newsletters from your favorite retailers to receive alerts on special promotions and exclusive deals.

5. Shop Early

Avoid the last-minute rush by starting your shopping early in November. This not only gives you more time to find the perfect gifts but also allows you to spread out your spending over the month, making it easier to stick to your budget.

6. Use Cash or a Prepaid Card

To help control your spending, consider using cash or a prepaid card for your holiday shopping. This way, you can only spend what you’ve allocated, reducing the temptation to overspend with credit cards.

7. Limit Online Shopping Temptations

While online shopping is convenient, it can also lead to impulse purchases. Set specific times for online shopping and stick to your list. Avoid browsing aimlessly, as this can lead to unnecessary spending.

8. Get Creative with Gifts

Consider making homemade gifts or giving experiences instead of physical items. Handmade treats, personalized photo albums, or tickets to a local event can be thoughtful and budget-friendly alternatives that your loved ones will cherish.

9. Keep Track of Your Spending

As you shop, keep a running total of your expenses. This will help you stay aware of how much you’ve spent and how much you have left in your budget. Use a simple spreadsheet or Google Doc to keep track of how much you have spent and what you, have left for gifts.

10. Stay Flexible and Open-Minded

Sometimes, the perfect gift may not be what you initially envisioned. Stay open to alternatives and be willing to adjust your list if you find something that fits your budget and feels right. Flexibility can lead to delightful surprises!

With these ten tips and tricks in your holiday shopping toolkit, you’ll be well-equipped to tackle your Christmas gift list and budget with confidence. Remember, the true spirit of the season lies in the thought and love behind each gift, not the price tag. So, embrace the joy of giving, stay focused, and make this holiday season one to remember! Happy shopping!

Don’t forget to buy a Thanksgiving Gift for the Host of the Dinner!

Make Your Holiday Card List | Day 6 of 60 | Holiday Prep for Thanksgiving and Christmas

Holiday Card Lists and Sending Fun Recipes to Family and Friends

The holiday season is a wonderful time to connect with loved ones, and what better way to do that than by sending holiday cards? This year, consider making your cards virtual e-cards and including a fun recipe that everyone can enjoy. Let’s dive into how to create your holiday card list, design your e-card, and share a delightful recipe!

Creating Your Holiday Card List

Start by making a list of everyone you want to send holiday greetings to. This can include:

  • Family members: Parents, siblings, cousins, and extended family.
  • Friends: Close friends, acquaintances, and neighbors.
  • Colleagues: Work friends and professional contacts.

To How Many People Should You Send Cards?

There’s no set number, but a good rule of thumb is to send cards to anyone you want to keep in touch with during the holidays. If you’re sending out physical cards, consider your budget and how many people you can realistically manage. For e-cards, the sky’s the limit!

Designing Your Virtual E-Card

Creating a virtual e-card is a fun and eco-friendly way to spread holiday cheer. Here are some great online platforms where you can design your e-card:

  • Canva: Offers a wide range of customizable templates for e-cards.
  • Paperless Post: Known for stylish designs and easy-to-use features.
  • Smilebox: Allows you to create animated e-cards with music and photos.

These platforms make it easy to personalize your e-card with festive graphics, your favorite colors, and a heartfelt message.

Include a Fun Recipe

To make your e-card even more special, include a fun recipe that your family and friends can try during the holidays. Here’s a simple and delicious recipe for Holiday Sugar Cookies that everyone will love!

Holiday Sugar Cookies Recipe

Ingredients:

  • 2 ¾ cups all-purpose flour
  • 1 teaspoon baking soda
  • ½ teaspoon baking powder
  • 1 cup unsalted butter, softened
  • 1 ½ cups white sugar
  • 1 egg
  • 1 teaspoon vanilla extract
  • ½ teaspoon almond extract
  • 3 to 4 tablespoons of colored sugar or sprinkles

Instructions:

  1. Preheat your oven to 375°F (190°C).
  2. In a small bowl, stir together flour, baking soda, and baking powder.
  3. In a large bowl, cream together the butter and sugar until smooth. Beat in the egg, vanilla extract, and almond extract.
  4. Gradually blend in the dry ingredients. Roll rounded teaspoonfuls of dough into balls, and place onto ungreased cookie sheets. Flatten each ball slightly with the bottom of a glass, and sprinkle with colored sugar.
  5. Bake 8 to 10 minutes in the preheated oven, or until golden. Let cool on wire racks.

Feel free to personalize the recipe with your own notes or tips!

Do you have a Side Business? Sending Cards as a Business Owner

If you’re a business owner, sending holiday cards can be a great way to connect with your customers and suppliers. Here’s how to approach it:

  • Customer List: Send cards to loyal customers to show appreciation. A good number is around 10-20% of your customer base, depending on your budget.
  • Supplier List: Sending cards to suppliers can strengthen your business relationships. Consider sending to key contacts.
  • Marketing List: If you have a marketing list, sending e-cards can be a cost-effective way to reach out during the holidays.

Sending holiday e-cards is a fun and meaningful way to connect with family, friends, and business contacts. By including a delightful recipe, you can spread joy and encourage others to create special memories in the kitchen. So, gather your card list, design your e-card, and get ready to share the holiday spirit! Happy holidays!

Guest Etiquette | Day 5 of 60 | Holiday Prep for Thanksgiving and Christmas

How Long Should You Stay as a Guest During the Holidays?

The holiday season is a time for family, friends, and celebration. But how long is it appropriate to stay as a guest at someone’s house during Thanksgiving and Christmas? Let’s break it down!

How Long is Too Long?

When visiting during the holidays, 2 to 4 hours is generally a good timeframe for a daytime visit. If you arrive for dinner, staying until dessert is served is usually acceptable. Leaving too soon, like right after the meal, can seem rude.

If you’re not staying overnight, aim to leave by 9 or 10 PM. This way, you won’t overstay your welcome, and your hosts can wind down their evening.

Guest Etiquette for the Holidays

As a guest, you should:

  • Help out: Offer to assist with setting the table or cleaning up.
  • Be polite: Thank your hosts for their hospitality.
  • Engage: Participate in conversations and activities.

As a host, you should:

  • Make everyone comfortable: Ensure guests have a place to sit and feel welcome.
  • Provide food and drinks: Keep the snacks and beverages flowing.
  • Plan activities: Have games or entertainment ready to keep the mood lively.

How Long Should You Stay?

For holiday gatherings, 3 to 5 hours is a good rule of thumb. This allows you to enjoy the festivities without feeling rushed or overstaying your welcome.

Gift Ideas for Your Hosts

Bringing a small gift is a thoughtful gesture. Here are some ideas:

  • For family: A homemade dish or dessert.
  • For friends: A bottle of wine or a festive candle.
  • For overnight stays: A cozy blanket or a fun board game.

Music Playlist for the Holidays

A good music playlist can set the mood for your gathering. Aim for a 2 to 3-hour playlist to cover the duration of your visit. Start playing it about 30 minutes before guests arrive to create a welcoming atmosphere.

Navigating holiday visits can be tricky, but with these guidelines, you can enjoy your time with family and friends without any awkward moments. Remember, the key is to be respectful and considerate of your hosts while making the most of the festive season!

Here is a playlist on YouTube that is 11 hours long and will get you through Christmas Day!

Start a Holiday Journal | Day 4 of 60 | Health Storey Prep for the Holidays

Day 4: Start Your Holiday Journal or Planner

The holiday season is a magical time filled with joy, family, and memories. One great way to capture all those moments is by starting a holiday journal or planner. Let’s explore how you can get started!

Why Keep a Holiday Journal?

Keeping a holiday journal allows you to document your experiences, thoughts, and feelings throughout the season. Here are some benefits:

  • Reflect on Memories: Writing helps you remember special moments.
  • Stay Organized: A planner can help you keep track of events, gifts, and to-do lists.
  • Boost Creativity: Journaling can inspire you to create new holiday traditions.

Choosing Between a Journal and a Planner

Both options have their perks, so it’s essential to choose what works best for you. Here’s a quick comparison:

FeatureHoliday JournalHoliday Planner
FocusPersonal reflectionsOrganization and planning
FormatFree-form writingStructured layout
CreativityHigh (doodles, stickers)Moderate (checklists)

Getting Started with Your Journal

If you decide to go with a journal, here are some tips to kick things off:

  1. Choose Your Journal: Pick one that inspires you, whether it’s a simple notebook or a fancy bound book.
  2. Set a Routine: Dedicate a few minutes each day to write about your holiday experiences.
  3. Include Prompts: Use prompts like “What am I grateful for this holiday?” or “What’s my favorite holiday memory?” to spark your creativity.

Starting Your Holiday Planner

If organization is your goal, a holiday planner might be the way to go. Here’s how to get started:

  1. Select a Planner: Look for one that has sections for events, gift lists, and meal planning.
  2. Create a Calendar: Mark important dates like parties, family gatherings, and deadlines for gift shopping.
  3. Make Lists: Write down gift ideas, recipes, and tasks to keep everything in one place.

Tips for Success

  • Be Consistent: Try to write or plan at the same time each day.
  • Add Personal Touches: Use stickers, drawings, or photos to make your journal or planner unique.
  • Review Regularly: Take time to read back through your entries or check off completed tasks.

Starting a holiday journal or planner can enhance your holiday experience. Whether you choose to reflect on your feelings or keep everything organized, you’ll create a treasure trove of memories to look back on for years to come.

For more tips on holiday preparation, check out Health-Storey and stay tuned for more ideas in our 60-day holiday prep series!

Pickng a Holiday Theme | Day 3 of 60 | Prepping for Thanksgiving and Christmas

Choosing Your Christmas and Holiday Season Theme for 2025

The holiday season is a magical time of year, filled with joy, family gatherings, and festive decorations. As we look ahead to 2025, it’s the perfect moment to start thinking about your Christmas and holiday theme.

Why Choose a Theme?

Having a theme can make your holiday celebrations more cohesive and memorable. It helps you decide on decorations, color schemes, and even the types of food you’ll serve. Plus, it adds a fun twist to your holiday preparations!

Popular Themes for 2025

Here are some exciting themes to consider for your holiday season:

1. Classic Winter Wonderland

  • Think whites, blues, and silvers.
  • Use snowflakes, icicles, and twinkling lights.

2. Rustic Charm

  • Incorporate natural elements like wood, pinecones, and burlap.
  • Use warm colors like red, green, and gold.

3. Vintage Christmas

  • Embrace retro decorations and colors.
  • Use old-fashioned ornaments and classic holiday music.

4. Modern Minimalism

  • Focus on simple, clean lines and a limited color palette.
  • Use geometric shapes and metallic accents.

5. Cultural Celebrations

  • Highlight traditions from different cultures.
  • Incorporate unique decorations and foods from around the world.

Tips for Choosing Your Theme

  • Consider Your Space: Think about how your chosen theme will fit into your home.
  • Budget Wisely: Some themes may require more decorations than others, so plan accordingly.
  • Involve Family: Get everyone’s input to make the theme more personal and fun.

Final Touches

Once you’ve chosen your theme, it’s time to get creative! From decorations to food, let your theme guide your choices.

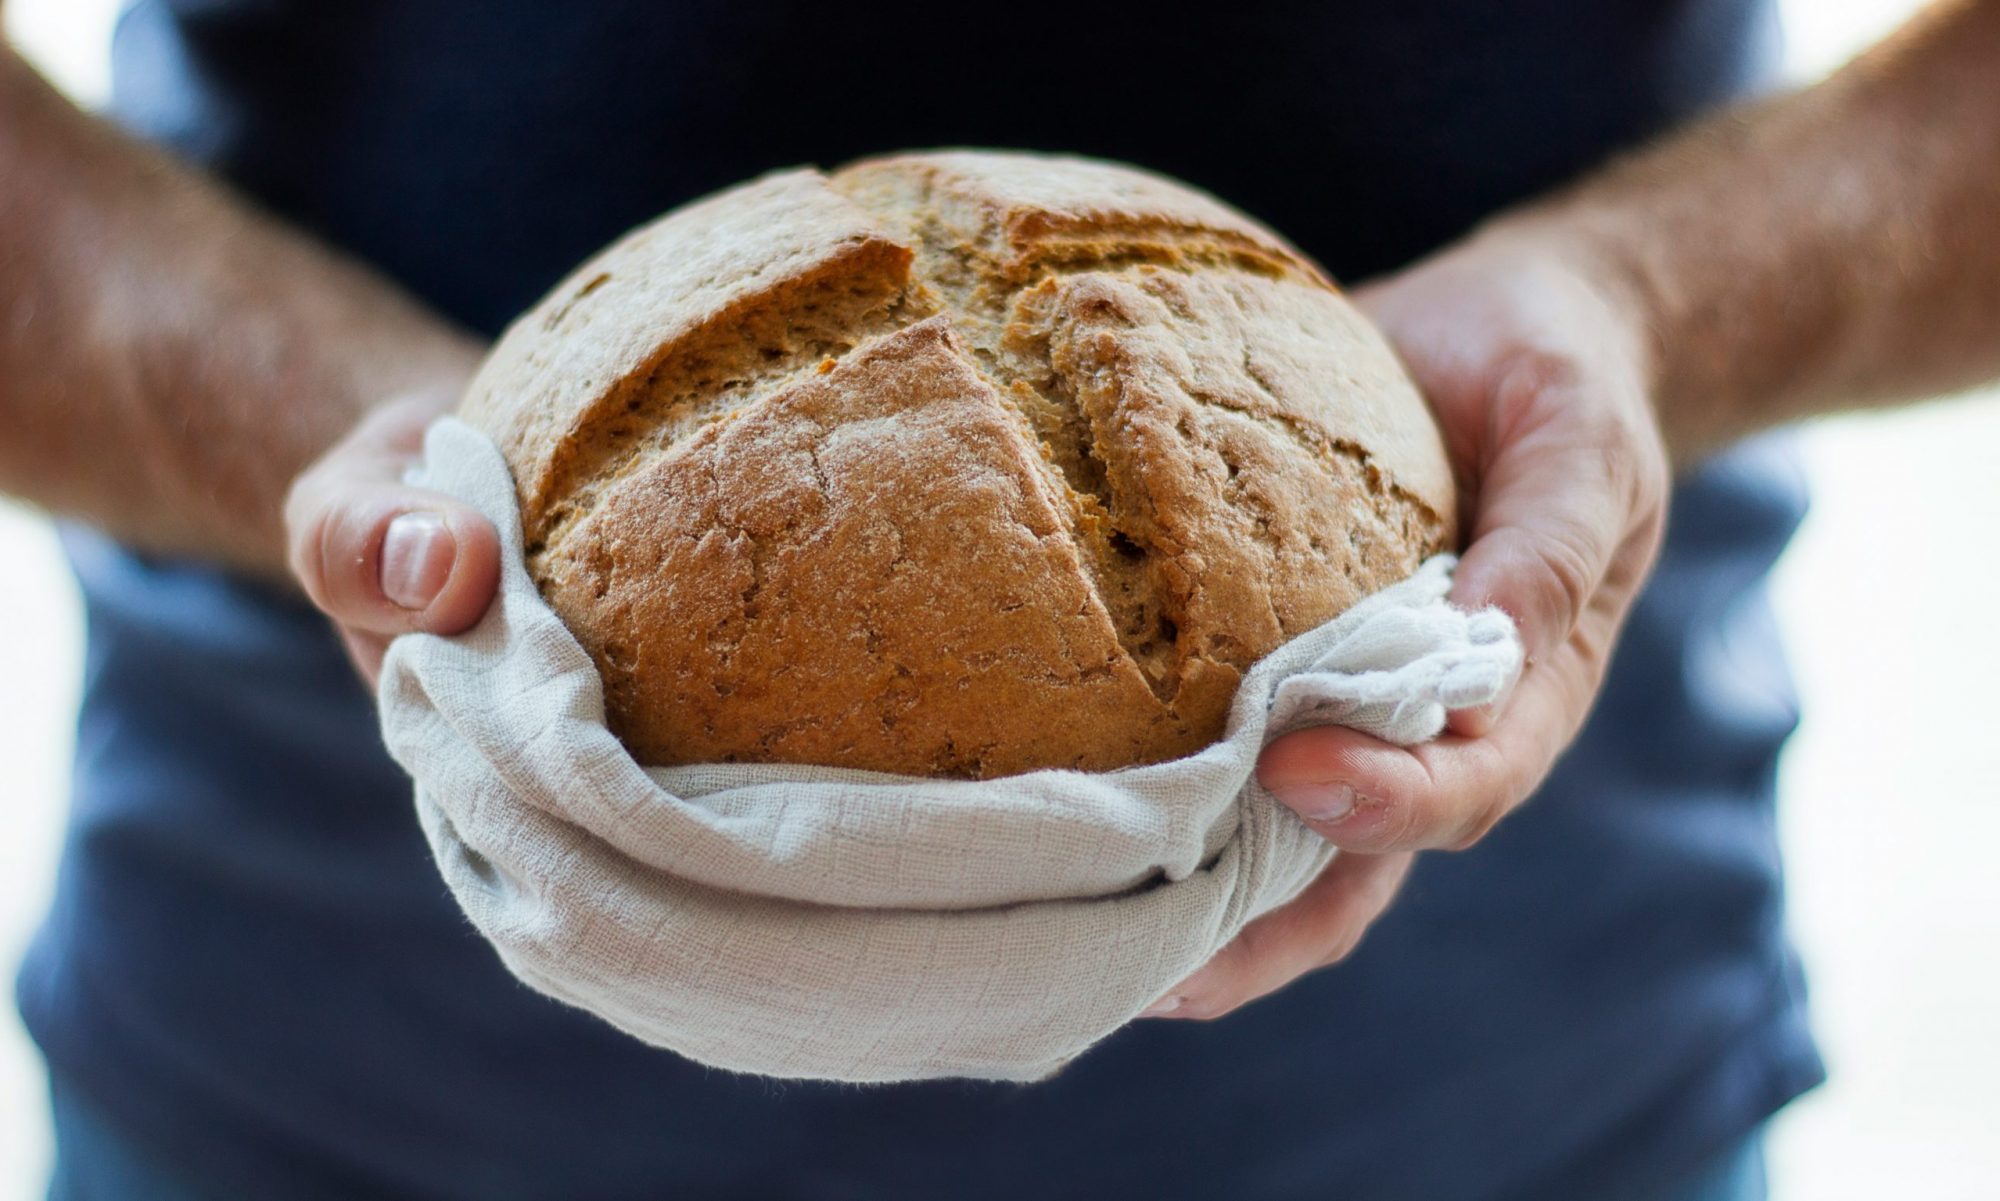
Atlanta White Detox Bread

A Festive Recipe to Try While Holiday Prepping

As you prepare for the holiday season, why not try making Atlanta White Bread? It’s a simple recipe that takes a few hours but can be a great addition to your holiday meals.

Ingredients:

  • 3 cups flour
  • 1/4 cup sugar
  • 1/8 cup oil
  • 3/4 tsp salt
  • 1 packet instant yeast
  • 1 cup warm water

Instructions:

  1. Mix the warm water and yeast packet together.
  2. Add some sugar and let the yeast bloom for about 5-10 minutes.
  3. In a bowl, mix the yeast mixture with salt, oil, and flour until combined.
  4. Knead the dough on a floured or oiled counter until smooth.
  5. Place the dough in a bowl and let it sit for 90 minutes.
  6. After 90 minutes, knead again and cut into four pieces and let them sit for another 30 minutes.
  7. Store three pieces for future meals and place one piece into your baking container.
  8. Bake for at least 20 minutes at 375 degrees.

Variations for the Holiday Season

  • Herb-Infused Bread: Add dried herbs like rosemary or thyme for a savory twist.
  • Sweet Cinnamon Bread: Mix in cinnamon and a bit of nutmeg for a sweet holiday flavor.
  • Cheese and Garlic Bread: Fold in shredded cheese and minced garlic for a delicious side.

With these ideas and recipes, you’re all set to make your 2025 holiday season unforgettable! Happy planning!

Day One | Holiday Prep for Thanksgiving and Christmas

The holiday season is just around the corner, and it’s time to get organized! Today, we’ll focus on setting budgets and planning menus for Thanksgiving and Christmas.

Step 1: Set Your Holiday Budget

  1. Review Last Year’s Spending
    Look back at your credit card and bank statements from last year. Write down what you spent on food and drinks for Thanksgiving, Black Friday, Saturday, and Sunday. If you do not have a budget set already, decide how much you want to spend on each person per day, that is your budget.
  • Thanksgiving Dinner: $____
  • Black Friday Snacks/Meals: $____
  • Saturday Meals: $____
  • Sunday Meals: $____
  • Total Food/Drink Expenses: $____
  1. Create a New Budget
    Based on last year’s spending, set a realistic budget for this year. Consider any changes in your guest list or menu that might affect costs. Health Storey does not believe in snacking, Can you add more food to the meals and eliminate grazing from each holiday?
  • Thanksgiving Budget: $____
  • Christmas Budget: $____
  • Total Holiday Budget: $____

Step 2: Plan Your Menus

Next, let’s think about what you want to serve. Here’s a simple outline to help you get started:

Thanksgiving Menu Ideas

  • Appetizers: Cheese platter, veggie tray, or stuffed mushrooms
  • Main Course: Roast turkey, Roasted and stuffed Squash
  • Sides: Mashed potatoes, green bean casserole, stuffing / dressing
  • Desserts: Apple crisp with Ice cream, Cranberry pound cake,

Christmas Menu Ideas

  • Appetizers: Bruschetta, chicken sausage bombs
  • Main Course: Vegetarian fried chicken
  • Sides: Roasted vegetables, cranberry sauce,
  • Desserts: Stolen bread, Christmas cakes,

Step 3: Meal Prep with the Instant Pot

To make meal prep easier, Health Storey suggests using an Instant Pot for making rice potatoes, steamed vegetables and hard boiled eggs. Here’s how to incorporate them into your meals:

  • Rice or Potatoes as a Base: One cup of steamed rice or potatoes can be the foundation for various meals throughout the week.

Example Meal Ideas

  • Rice Bowl: Top with grilled vegetarian chicken sausage, veggies, and teriyaki sauce.
  • Stuffed Squash: Mix rice with ground turkey, spices and place inside of baked or grilled carnival squash.
  • Potato Casserole: Layer potatoes with cheese, broccoli, and ham in an oven safe dish.

Step 4: Grocery Shopping

If you only shop on weekends, consider buying a 2-pound bag of rice per person per week for about $5.00 each.

By setting a budget and planning your menus today, you’ll be well on your way to a stress-free holiday season. Remember to keep track of your spending and adjust your budget as needed. Happy prepping!