Start Setting Up the Christmas Tree|Day 16 of 60 of Holiday Prep

Setting Up Your Christmas Tree: A Guide to Traditions and Tips

The holiday season is upon us, and for many, that means it’s time to bring out the Christmas tree! Whether you opt for a real evergreen or a beautifully crafted artificial tree, the process of setting it up is a cherished tradition that brings families together. In this blog post, we’ll explore different customs for decorating your tree, the significance of placing a manger underneath, and some tips to make your tree setup a delightful experience.

The Joy of Setting Up Your Christmas Tree

Setting up your Christmas tree is more than just a task; it’s an opportunity to create lasting memories with loved ones. From selecting the perfect tree to hanging ornaments, each step is filled with excitement and anticipation. Here are some tips to make the process enjoyable:

  1. Choose the Right Tree: Whether you prefer a classic fir, a fragrant pine, or a modern artificial tree, selecting the right one is crucial. Consider the size of your space and the style you want to achieve.
  2. Gather Your Supplies: Before you start decorating, gather all your supplies. This includes lights, ornaments, garlands, and a tree topper. Having everything on hand will streamline the process.
  3. Set the Mood: Play your favorite holiday music or sip on some hot cocoa while you decorate. Creating a festive atmosphere can enhance the experience and make it more enjoyable.
  4. Involve Everyone: Make tree decorating a family affair! Encourage everyone to contribute by hanging ornaments, stringing lights, or adding personal touches. This not only makes the process faster but also creates cherished memories.

Customs for Tree Decorating

Different cultures and families have unique customs when it comes to decorating their Christmas trees. Here are a few popular traditions:

  • Themed Trees: Some families choose a specific theme for their tree, such as a color scheme or a particular style (rustic, modern, vintage). This can create a cohesive look and make decorating more fun.
  • Handmade Ornaments: Many families have a tradition of making their own ornaments. This could be anything from salt dough creations to painted pinecones. These handmade decorations often hold sentimental value and tell a story.
  • The Advent Calendar: In some cultures, families hang an advent calendar on or near the tree, counting down the days until Christmas. Each day, a small gift or treat is revealed, adding to the excitement.
  • The Star or Angel on Top: Traditionally, many families place a star or angel at the top of the tree, symbolizing the Star of Bethlehem or the angel that announced Jesus’ birth. This is often the final touch that completes the tree.

The Significance of the Manger

One question that often arises during the holiday season is whether you should place a manger under the tree. While it’s not a universal custom, many families choose to do so as a way to honor the true meaning of Christmas. The manger represents the birthplace of Jesus and serves as a reminder of the holiday’s religious significance.

Incorporating a manger into your tree setup can be a beautiful way to blend festive decor with meaningful symbolism. Some families even create a nativity scene that includes figurines of Mary, Joseph, and the baby Jesus, along with the shepherds and wise men, to further emphasize the story of Christmas.

Final Touches

Once your tree is fully decorated, take a step back and admire your handiwork. Consider adding some final touches, such as a tree skirt or additional lights to enhance the overall look. Don’t forget to capture the moment with photos, as these memories will be cherished for years to come.

Setting up your Christmas tree is a delightful tradition that brings joy and warmth to your home. By incorporating various customs and personal touches, you can create a unique and meaningful holiday experience. So gather your loved ones, put on some festive music, and enjoy the magic of decorating your Christmas tree together!

Wrap Presents! | Day 14 of 60 Day Holiday Prep

Preparing for Christmas: Wrapping Presents and Keeping the Magic Alive

The holiday season is upon us, and with it comes the joy of gift-giving! As we prepare for Christmas, one of the most delightful tasks is wrapping presents for our loved ones. It’s a time to get creative, add a personal touch, and build excitement for the big day. In this blog post, we’ll explore some tips for wrapping gifts, suggest mailing dates to ensure timely delivery, and share clever ideas for keeping those wrapped presents under wraps until Christmas morning.

Wrapping Presents: Tips and Tricks

1. Choose Your Wrapping Supplies: Gather all the materials you’ll need before you start. This includes wrapping paper, scissors, tape, ribbons, and gift tags. Consider using eco-friendly wrapping options like reusable fabric wraps or recycled paper to add a sustainable touch to your gifts.

2. Create a Wrapping Station: Set up a designated area for wrapping presents. A large table or clean floor space works well. Make sure you have good lighting and all your supplies within reach to streamline the process.

3. Personalize Your Gifts: Add a personal touch to each gift by using unique wrapping paper or embellishments that reflect the recipient’s personality. You can also write a heartfelt note on the gift tag to make it even more special.

4. Get Creative with Techniques: Experiment with different wrapping techniques, such as the classic box wrap, the Japanese furoshiki method, or even using a gift bag with tissue paper. Don’t be afraid to mix and match styles for a fun and festive look!

Mailing Gifts: Important Dates to Remember

To ensure your gifts arrive on time, it’s essential to plan ahead. Here are some suggested mailing dates based on common shipping carriers:

– USPS: For domestic shipping, aim to send your packages by December 15th for First-Class Mail and December 20th for Priority Mail. For international shipping, consider mailing by December 5th to allow for potential delays.

– UPS: For ground shipping within the U.S., send your packages by December 15th. If you’re using UPS 2nd Day Air, aim for December 21st, and for Next Day Air, December 22nd.

– FedEx: For FedEx Ground, mail by December 15th. For Express services, send your gifts by December 22nd for overnight delivery.

Always check with your chosen carrier for the most up-to-date shipping deadlines, as they may vary based on location and service level.

Keeping the Magic Alive: Preventing Early Openings

The excitement of Christmas can sometimes lead to early gift openings, especially for curious little ones. Here are some strategies to keep those wrapped presents a surprise until the big day:

1. Designate a “Gift Zone”: Choose a specific area in your home for storing wrapped gifts. This could be a closet, a spare room, or even under the bed. Make sure it’s a place that’s not easily accessible to children or pets.

2. Use a Gift Box or Container: Consider placing wrapped gifts inside a large box or storage container with a lid. This adds an extra layer of protection and makes it less tempting for little hands to explore.

3. Create a “Do Not Open” Sign: If you have older children, involve them in the process by creating a fun “Do Not Open Until Christmas” sign to hang on the door of the gift zone. This can help build anticipation and excitement.

4. Get Creative with Hiding Spots: Think outside the box when it comes to hiding gifts. Consider placing them in less obvious locations, such as the attic, basement, or even in the trunk of your car (if it’s safe to do so). Just be sure to remember where you’ve hidden them!

5. Involve the Family: Make wrapping gifts a family activity. This way, everyone is involved in the excitement, and it can help deter anyone from sneaking a peek at their own gifts.

As you prepare for Christmas, wrapping presents is just one of the many joyful tasks that come with the season. By planning ahead for mailing dates and finding clever ways to keep gifts hidden, you can ensure that the magic of Christmas remains intact. So gather your supplies, get creative, and enjoy the process of wrapping those special gifts for your loved ones. Happy holidays!

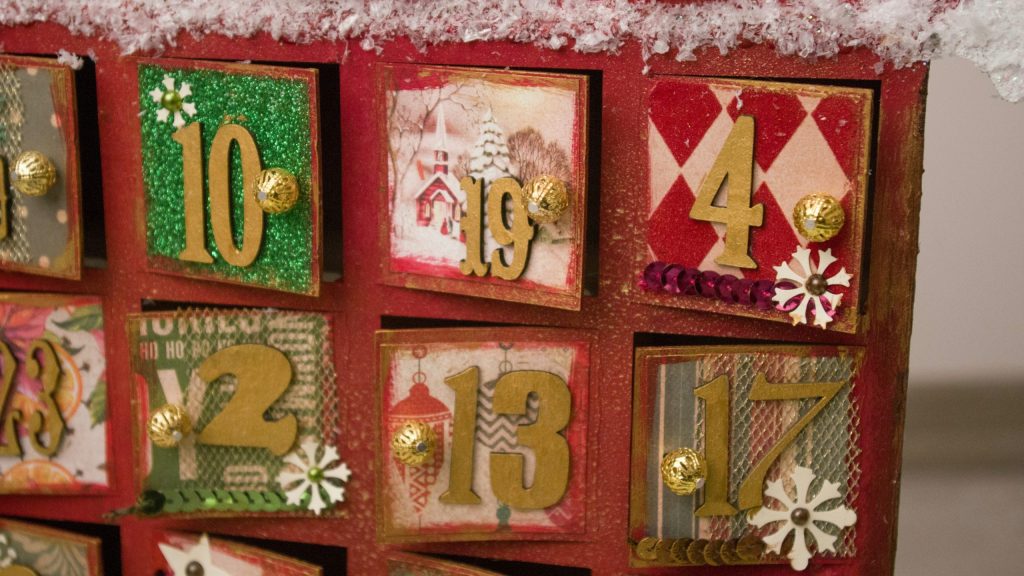
DIY: Create Your Advent’s Calendar | Day 10 of 60 | Preparing for the Holidays

Advents Calendars don’t have to be filled with chocolate or bought in the store

Crafting Your Own Advent Calendar: Creative Ideas and Gift Suggestions

The holiday season is a time for joy, celebration, and anticipation, and what better way to count down the days to Christmas than with a DIY advent calendar? While traditional calendars often feature chocolates or candies, you can get creative and design one that suits your style and preferences. Whether you choose to use envelopes, boxes, or bags, the possibilities are endless! Here’s how to create your own advent calendar and some thoughtful gift ideas to include.

1. Creating an Advent Calendar with Envelopes

Using envelopes is a simple and versatile way to create an advent calendar. Here’s how to do it:

Materials Needed:

  • 24 small envelopes (you can decorate them with festive designs)
  • String or ribbon for hanging
  • Clothespins or tape
  • Small gifts or notes to fill the envelopes

Instructions:

  1. Decorate the Envelopes: Use markers, stickers, or washi tape to personalize each envelope. Number them from 1 to 24 for the days leading up to Christmas.
  2. Fill the Envelopes: Instead of sweets, consider filling each envelope with small gifts, notes, or even cash. For example, I created an advent calendar filled with money to spend after Christmas on holiday shopping. This gives me extra spending money for post-holiday sales and avoids the temptation of extra chocolates or candies in the house.
  3. Display Your Calendar: Hang the envelopes on a string or ribbon using clothespins, or arrange them on a shelf or table for easy access.

2. Creating an Advent Calendar with Boxes

If you prefer a more structured approach, using small boxes can be a fun way to create your advent calendar.

Materials Needed:

  • 24 small boxes (you can use gift boxes, matchboxes, or even repurpose small containers)
  • Decorative paper or wrapping for the boxes
  • Number stickers or tags
  • Small gifts or treats to fill the boxes

Instructions:

  1. Wrap the Boxes: Decorate each box with festive wrapping paper or paint. Number them from 1 to 24.
  2. Fill the Boxes: Choose a variety of small gifts, such as mini candles, ornaments, or beauty products. You can also include handwritten notes with fun activities or experiences to enjoy during the holiday season.
  3. Arrange the Boxes: Stack the boxes in a pyramid shape, line them up on a shelf, or create a festive display on your dining table.

3. Creating an Advent Calendar with Bags

Using small bags is another creative option for your advent calendar. This method is especially great for a more casual and playful look.

Materials Needed:

  • 24 small bags (paper, fabric, or burlap bags work well)
  • Twine or string for hanging
  • Number tags or stickers
  • Fun gifts or surprises to fill the bags

Instructions:

  1. Decorate the Bags: Use tags or stickers to number each bag from 1 to 24. You can also personalize them with festive designs or names.
  2. Fill the Bags: Consider including a mix of small gifts, such as tea bags, handmade coupons for activities, or even a few holiday-themed items like ornaments or decorations.
  3. Display the Bags: Hang the bags on a string or arrange them in a basket for a charming display.

Creating your own advent calendar is a wonderful way to add a personal touch to your holiday season. Whether you choose to use envelopes, boxes, or bags, the key is to fill them with thoughtful gifts. By customizing your advent calendar, you can make the countdown to Christmas even more special, all while avoiding the extra calories that often come with traditional calendars. So gather your materials, get creative, and enjoy the process of crafting a unique advent calendar that reflects your style and spirit! Happy holidays!

Guest Etiquette | Day 5 of 60 | Holiday Prep for Thanksgiving and Christmas

How Long Should You Stay as a Guest During the Holidays?

The holiday season is a time for family, friends, and celebration. But how long is it appropriate to stay as a guest at someone’s house during Thanksgiving and Christmas? Let’s break it down!

How Long is Too Long?

When visiting during the holidays, 2 to 4 hours is generally a good timeframe for a daytime visit. If you arrive for dinner, staying until dessert is served is usually acceptable. Leaving too soon, like right after the meal, can seem rude.

If you’re not staying overnight, aim to leave by 9 or 10 PM. This way, you won’t overstay your welcome, and your hosts can wind down their evening.

Guest Etiquette for the Holidays

As a guest, you should:

  • Help out: Offer to assist with setting the table or cleaning up.
  • Be polite: Thank your hosts for their hospitality.
  • Engage: Participate in conversations and activities.

As a host, you should:

  • Make everyone comfortable: Ensure guests have a place to sit and feel welcome.
  • Provide food and drinks: Keep the snacks and beverages flowing.
  • Plan activities: Have games or entertainment ready to keep the mood lively.

How Long Should You Stay?

For holiday gatherings, 3 to 5 hours is a good rule of thumb. This allows you to enjoy the festivities without feeling rushed or overstaying your welcome.

Gift Ideas for Your Hosts

Bringing a small gift is a thoughtful gesture. Here are some ideas:

  • For family: A homemade dish or dessert.
  • For friends: A bottle of wine or a festive candle.
  • For overnight stays: A cozy blanket or a fun board game.

Music Playlist for the Holidays

A good music playlist can set the mood for your gathering. Aim for a 2 to 3-hour playlist to cover the duration of your visit. Start playing it about 30 minutes before guests arrive to create a welcoming atmosphere.

Navigating holiday visits can be tricky, but with these guidelines, you can enjoy your time with family and friends without any awkward moments. Remember, the key is to be respectful and considerate of your hosts while making the most of the festive season!

Here is a playlist on YouTube that is 11 hours long and will get you through Christmas Day!

60 Days to Christmas| Preparing a Weekly Holiday Budget

Christmas Budget

Welcome to the Prep Which Starts on October 24 2025. For Day which is next week, create a Budget for your Christmas season. Here is a weekly budget we set for a single person living in the Atlanta who doesn’t have to travel over the holidays.

Budget for Christmas

8 Week Holiday Budget Breakdown (8 Weeks Before the Christmas Holiday)

Total Budget: $1,070  Weekly Budget: $133.75

Weekly Breakdown

Week 1

   – Advent Calendar Gifts: $25  

   – Gifts: $50  

   – Total: $75

Week 2

   – Advent Calendar Gifts: $25  

   – Gifts: $50  

   – Total: $75

Week 3

   – Advent Calendar Gifts: $25  

   – Food and Beverages: $50  

   – Total: $75

Week 4

   – Advent Calendar Gifts: $25  

   – Decorations: $50  

   – Total: $75

Week 5

   – Advent Calendar Gifts: $25  

   – Holiday Cards: $25  

   – Gifts: $50  

   – Total: $100

Week 6

   – Advent Calendar Gifts: $25  

   – Food and Beverages: $50  

   – Total: $75

Week 7

   – Advent Calendar Gifts: $25  

   – Travel Expenses: $50  

   – Total: $75

Week 8

   – Advent Calendar Gifts: $25  

   – Charitable Donations: $50  

   – Miscellaneous: $50  

   – Total: $125

Adjust the amounts based on your personal preferences and financial situation. Happy budgeting and we look forward to preparing for the holiday season with you starting on the 25th of October 2025.