Start Setting Up the Christmas Tree|Day 16 of 60 of Holiday Prep

Setting Up Your Christmas Tree: A Guide to Traditions and Tips

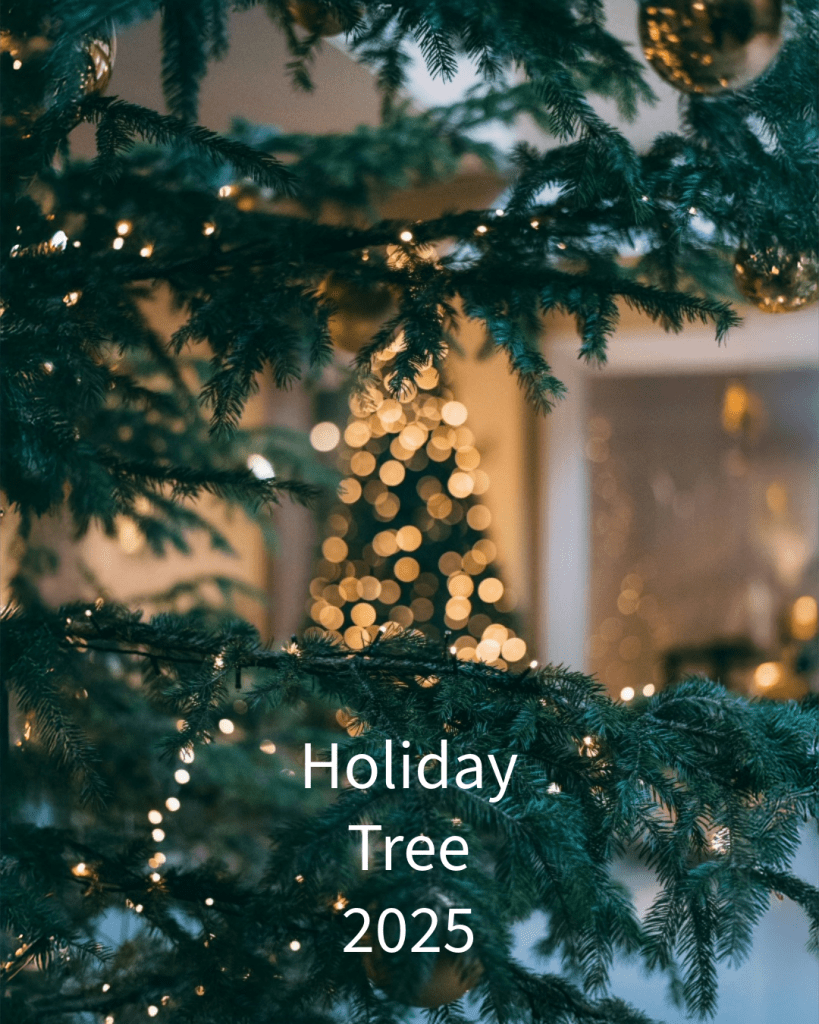
The holiday season is upon us, and for many, that means it’s time to bring out the Christmas tree! Whether you opt for a real evergreen or a beautifully crafted artificial tree, the process of setting it up is a cherished tradition that brings families together. In this blog post, we’ll explore different customs for decorating your tree, the significance of placing a manger underneath, and some tips to make your tree setup a delightful experience.

The Joy of Setting Up Your Christmas Tree

Setting up your Christmas tree is more than just a task; it’s an opportunity to create lasting memories with loved ones. From selecting the perfect tree to hanging ornaments, each step is filled with excitement and anticipation. Here are some tips to make the process enjoyable:

  1. Choose the Right Tree: Whether you prefer a classic fir, a fragrant pine, or a modern artificial tree, selecting the right one is crucial. Consider the size of your space and the style you want to achieve.
  2. Gather Your Supplies: Before you start decorating, gather all your supplies. This includes lights, ornaments, garlands, and a tree topper. Having everything on hand will streamline the process.
  3. Set the Mood: Play your favorite holiday music or sip on some hot cocoa while you decorate. Creating a festive atmosphere can enhance the experience and make it more enjoyable.
  4. Involve Everyone: Make tree decorating a family affair! Encourage everyone to contribute by hanging ornaments, stringing lights, or adding personal touches. This not only makes the process faster but also creates cherished memories.

Customs for Tree Decorating

Different cultures and families have unique customs when it comes to decorating their Christmas trees. Here are a few popular traditions:

  • Themed Trees: Some families choose a specific theme for their tree, such as a color scheme or a particular style (rustic, modern, vintage). This can create a cohesive look and make decorating more fun.
  • Handmade Ornaments: Many families have a tradition of making their own ornaments. This could be anything from salt dough creations to painted pinecones. These handmade decorations often hold sentimental value and tell a story.
  • The Advent Calendar: In some cultures, families hang an advent calendar on or near the tree, counting down the days until Christmas. Each day, a small gift or treat is revealed, adding to the excitement.
  • The Star or Angel on Top: Traditionally, many families place a star or angel at the top of the tree, symbolizing the Star of Bethlehem or the angel that announced Jesus’ birth. This is often the final touch that completes the tree.

The Significance of the Manger

One question that often arises during the holiday season is whether you should place a manger under the tree. While it’s not a universal custom, many families choose to do so as a way to honor the true meaning of Christmas. The manger represents the birthplace of Jesus and serves as a reminder of the holiday’s religious significance.

Incorporating a manger into your tree setup can be a beautiful way to blend festive decor with meaningful symbolism. Some families even create a nativity scene that includes figurines of Mary, Joseph, and the baby Jesus, along with the shepherds and wise men, to further emphasize the story of Christmas.

Final Touches

Once your tree is fully decorated, take a step back and admire your handiwork. Consider adding some final touches, such as a tree skirt or additional lights to enhance the overall look. Don’t forget to capture the moment with photos, as these memories will be cherished for years to come.

Setting up your Christmas tree is a delightful tradition that brings joy and warmth to your home. By incorporating various customs and personal touches, you can create a unique and meaningful holiday experience. So gather your loved ones, put on some festive music, and enjoy the magic of decorating your Christmas tree together!

Start Working on Holiday Lights | A comprehensive Guide| Day 15 of 60 Holiday Prep for Thanksgiving and Christmas

Holiday Lights for 2025

The holiday season is upon us, and what better way to spread cheer than by adorning your home with beautiful Christmas lights? Whether you live in a cozy one-bedroom apartment or a spacious three-bedroom house, there are plenty of ways to create a festive atmosphere without breaking the bank. In this blog post, we’ll explore budgeting for lights and electricity, decorating themes for 2025, installation timeframes, and safety tips to ensure your holiday decorating is both joyful and safe.

Budgeting for Christmas Lights

One-Bedroom Apartment

  • Lights Budget: $50 – $100
  • String lights: $20 – $40
  • Accent lights (like LED candles or small decorations): $30 – $60
  • Electricity Cost: Approximately $10 – $20
  • Expect an increase of about $5 – $10 per month for the holiday season.

Two-Bedroom Apartment

  • Lights Budget: $100 – $200
  • String lights: $40 – $80
  • Additional decorations (like wreaths or window lights): $60 – $120
  • Electricity Cost: Approximately $15 – $30
  • An increase of about $10 – $15 per month.

Three-Bedroom House

  • Lights Budget: $200 – $500
  • String lights: $80 – $150
  • Outdoor decorations (like inflatable figures or larger displays): $120 – $350
  • Electricity Cost: Approximately $30 – $60
  • An increase of about $20 – $30 per month.

Decorating Themes for 2025

As we step into 2025, several exciting themes are trending for Christmas decorations:

  1. Sustainable and Eco-Friendly: Using solar-powered lights and biodegradable decorations is becoming increasingly popular.
  2. Vintage Charm: Retro colors and classic designs evoke nostalgia, with warm whites and soft pastels leading the way.
  3. Minimalist Elegance: Simple, clean lines with a focus on natural materials and subtle lighting create a serene holiday atmosphere.
  4. Whimsical Wonderland: Bright colors, playful designs, and fun characters bring a sense of joy and playfulness to your decor.

Installation Timeframes

  • One-Bedroom Apartment: Expect to spend about 1-2 hours setting up your lights, especially if you’re keeping it minimal.
  • Two-Bedroom Apartment: Allocate around 2-4 hours for a more elaborate setup, including both internal and external decorations.
  • Three-Bedroom House: Depending on the complexity, it can take anywhere from 4-8 hours to fully decorate, especially if you’re incorporating outdoor lighting.

Safety Tips and Hazards to Avoid

When putting up Christmas lights, safety should always be a priority. Here are some essential tips to keep in mind:

  1. Check for Damage: Inspect all lights and cords for frays or damage before use. Discard any that are not in good condition.
  2. Use Indoor/Outdoor Rated Lights: Ensure that your lights are rated for the environment in which you’re using them. Indoor lights should not be used outside.
  3. Avoid Overloading Circuits: Be mindful of how many lights you plug into a single outlet. Overloading can lead to tripped breakers or even fires.
  4. Secure Your Ladder: If you’re using a ladder to hang lights, ensure it’s stable and positioned on a flat surface. Never lean too far to one side.
  5. Keep Decorations Away from Heat Sources: Ensure that lights are not placed near flammable materials or heat sources to prevent fire hazards.
  6. Turn Off Lights When Not Home: To save energy and reduce fire risks, turn off your lights when you’re not home or use a timer.

Decorating your home with Christmas lights is a wonderful way to celebrate the holiday season and create a warm, inviting atmosphere. By planning your budget, choosing a theme that resonates with you, and following safety guidelines, you can enjoy a beautifully lit home without the stress. So gather your lights, get creative, and let your holiday spirit shine bright!

Wrap Presents! | Day 14 of 60 Day Holiday Prep

Preparing for Christmas: Wrapping Presents and Keeping the Magic Alive

The holiday season is upon us, and with it comes the joy of gift-giving! As we prepare for Christmas, one of the most delightful tasks is wrapping presents for our loved ones. It’s a time to get creative, add a personal touch, and build excitement for the big day. In this blog post, we’ll explore some tips for wrapping gifts, suggest mailing dates to ensure timely delivery, and share clever ideas for keeping those wrapped presents under wraps until Christmas morning.

Wrapping Presents: Tips and Tricks

1. Choose Your Wrapping Supplies: Gather all the materials you’ll need before you start. This includes wrapping paper, scissors, tape, ribbons, and gift tags. Consider using eco-friendly wrapping options like reusable fabric wraps or recycled paper to add a sustainable touch to your gifts.

2. Create a Wrapping Station: Set up a designated area for wrapping presents. A large table or clean floor space works well. Make sure you have good lighting and all your supplies within reach to streamline the process.

3. Personalize Your Gifts: Add a personal touch to each gift by using unique wrapping paper or embellishments that reflect the recipient’s personality. You can also write a heartfelt note on the gift tag to make it even more special.

4. Get Creative with Techniques: Experiment with different wrapping techniques, such as the classic box wrap, the Japanese furoshiki method, or even using a gift bag with tissue paper. Don’t be afraid to mix and match styles for a fun and festive look!

Mailing Gifts: Important Dates to Remember

To ensure your gifts arrive on time, it’s essential to plan ahead. Here are some suggested mailing dates based on common shipping carriers:

– USPS: For domestic shipping, aim to send your packages by December 15th for First-Class Mail and December 20th for Priority Mail. For international shipping, consider mailing by December 5th to allow for potential delays.

– UPS: For ground shipping within the U.S., send your packages by December 15th. If you’re using UPS 2nd Day Air, aim for December 21st, and for Next Day Air, December 22nd.

– FedEx: For FedEx Ground, mail by December 15th. For Express services, send your gifts by December 22nd for overnight delivery.

Always check with your chosen carrier for the most up-to-date shipping deadlines, as they may vary based on location and service level.

Keeping the Magic Alive: Preventing Early Openings

The excitement of Christmas can sometimes lead to early gift openings, especially for curious little ones. Here are some strategies to keep those wrapped presents a surprise until the big day:

1. Designate a “Gift Zone”: Choose a specific area in your home for storing wrapped gifts. This could be a closet, a spare room, or even under the bed. Make sure it’s a place that’s not easily accessible to children or pets.

2. Use a Gift Box or Container: Consider placing wrapped gifts inside a large box or storage container with a lid. This adds an extra layer of protection and makes it less tempting for little hands to explore.

3. Create a “Do Not Open” Sign: If you have older children, involve them in the process by creating a fun “Do Not Open Until Christmas” sign to hang on the door of the gift zone. This can help build anticipation and excitement.

4. Get Creative with Hiding Spots: Think outside the box when it comes to hiding gifts. Consider placing them in less obvious locations, such as the attic, basement, or even in the trunk of your car (if it’s safe to do so). Just be sure to remember where you’ve hidden them!

5. Involve the Family: Make wrapping gifts a family activity. This way, everyone is involved in the excitement, and it can help deter anyone from sneaking a peek at their own gifts.

As you prepare for Christmas, wrapping presents is just one of the many joyful tasks that come with the season. By planning ahead for mailing dates and finding clever ways to keep gifts hidden, you can ensure that the magic of Christmas remains intact. So gather your supplies, get creative, and enjoy the process of wrapping those special gifts for your loved ones. Happy holidays!

Make Holiday Cards – Holiday Postcards | Day 13 of 60 for Health Storey Holiday Prep

Holiday Cards: DIY vs. Ordering – What You Need to Know

The holiday season is just around the corner, and that means it’s time to start thinking about sending out holiday cards! Whether you prefer the personal touch of DIY cards or the convenience of ordering personalized ones, there are plenty of options to suit your style and budget. In this blog post, we’ll explore both avenues, providing easy instructions for making your own cards and a breakdown of costs for ordering personalized cards and postcards.

DIY Holiday Cards: Easy Instructions

Creating your own holiday cards can be a fun and rewarding project. Here’s a simple step-by-step guide to help you get started:

Materials Needed:

  • Blank cardstock or pre-folded blank cards
  • Colored markers, pens, or watercolors
  • Stamps or stickers for decoration
  • Glue or double-sided tape
  • Scissors
  • Envelopes (if not included with the cards)
  • Optional: Ribbon, glitter, or other embellishments

Instructions:

  1. Choose Your Design: Decide on a theme for your cards. It could be a winter wonderland, a cozy holiday scene, or a simple “Happy Holidays” message. Sketch out your design on a piece of paper first if you’d like.
  2. Cut the Cardstock: If you’re using cardstock, cut it to your desired size. A standard size is 5” x 7” when folded.
  3. Decorate the Front: Use your markers, pens, or watercolors to create your design on the front of the card. You can also add stamps or stickers for extra flair.
  4. Write a Message: Inside the card, write a heartfelt message. This could be a simple holiday greeting or a personal note to the recipient.
  5. Add Finishing Touches: If you want to get creative, add embellishments like ribbon or glitter to make your cards stand out.
  6. Address and Send: Once your cards are complete, place them in envelopes, address them, and send them off to your loved ones!

Estimated Budget for DIY Cards:

  • Blank cardstock (pack of 50): $10.00
  • Colored markers or pens: $5.00
  • Stamps or stickers: $5.00
  • Glue or tape: $2.00
  • Envelopes (if not included): $5.00
  • Total Estimated Cost: $27.00 (for 50 cards)

Ordering Personalized Holiday Cards

If you prefer the convenience of ordering personalized holiday cards, there are many online services that offer a variety of designs and customization options. Here’s a breakdown of costs:

  1. Personalized Holiday Cards:
  • Average cost for a set of 25 personalized cards: $30.00 to $60.00, depending on the design and printing quality.
  • This typically includes envelopes and the option to add a personal message or photo.
  1. Postcards:
  • Average cost for a set of 25 personalized postcards: $20.00 to $40.00.
  • Postcards are a great option if you want a simpler design and don’t need envelopes.
  1. Shipping Costs:
  • Don’t forget to factor in shipping costs, which can range from $5.00 to $15.00, depending on the service and delivery speed.

Total Estimated Cost for Ordering Cards:

  • Personalized holiday cards (25): $30.00 to $60.00
  • Postcards (25): $20.00 to $40.00
  • Shipping: $5.00 to $15.00
  • Total Estimated Cost: $55.00 to $115.00 (for 25 cards or postcards)

Whether you choose to make your own holiday cards or order personalized ones, both options have their unique benefits. DIY cards allow for creativity and a personal touch, while ordered cards offer convenience and professional quality. Consider your budget, time, and the message you want to convey when making your decision. Whichever route you take, sending holiday cards is a wonderful way to connect with loved ones and spread joy during the festive season! Happy card-making (or ordering)!

Buy Holiday Ingredients for Baking | Day 12 of 60 for Health-Storey Holiday prep

Holiday Baking Preparation: Your Essential Ingredient List and Budget

The holiday season is upon us, and with it comes the joy of baking! Whether you’re preparing Christmas cookies for gifting, Thanksgiving pies, or festive breads and cakes, having the right ingredients on hand is essential for a successful baking experience. To help you get started, we’ve compiled a comprehensive list of essential holiday baking ingredients along with an estimated budget for a family of four.

Essential Holiday Baking Ingredients

  1. Flour
  • All-purpose flour (5 lbs)
  • Estimated Cost: $3.00
  1. Sugar
  • Granulated sugar (4 lbs)
  • Brown sugar (2 lbs)
  • Estimated Cost: $4.00
  1. Baking Powder and Baking Soda
  • Baking powder (8 oz)
  • Baking soda (8 oz)
  • Estimated Cost: $2.00
  1. Salt
  • Kosher salt (26 oz)
  • Estimated Cost: $1.00
  1. Butter
  • Unsalted butter (1 lb)
  • Estimated Cost: $4.00
  1. Eggs
  • Large eggs (1 dozen)
  • Estimated Cost: $3.00
  1. Milk
  • Whole milk (1 gallon)
  • Estimated Cost: $3.00
  1. Vanilla Extract
  • Pure vanilla extract (4 oz)
  • Estimated Cost: $6.00
  1. Cocoa Powder (for chocolate treats)
  • Unsweetened cocoa powder (8 oz)
  • Estimated Cost: $3.00
  1. Nuts (optional, for cookies and cakes)
    • Walnuts or pecans (1 lb)
    • Estimated Cost: $6.00
  2. Chocolate Chips (for cookies)
    • Semi-sweet chocolate chips (12 oz)
    • Estimated Cost: $3.00
  3. Fruits (for pies and breads)
    • Fresh cranberries (12 oz)
    • Apples (3 lbs)
    • Estimated Cost: $5.00
  4. Spices
    • Ground cinnamon (2 oz)
    • Ground nutmeg (2 oz)
    • Ground ginger (2 oz)
    • Estimated Cost: $4.00
  5. Yeast (for bread)
    • Active dry yeast (3 packets)
    • Estimated Cost: $2.00
  6. Zest and Juice (for flavor)
    • Lemons (2)
    • Oranges (2)
    • Estimated Cost: $2.00

Estimated Budget for Holiday Baking

Now that we have our essential ingredients listed, let’s calculate the estimated total cost for a family of four:

IngredientEstimated Cost
All-purpose flour$3.00
Granulated sugar$2.00
Brown sugar$2.00
Baking powder$1.00
Baking soda$1.00
Kosher salt$1.00
Unsalted butter$4.00
Large eggs$3.00
Whole milk$3.00
Pure vanilla extract$6.00
Unsweetened cocoa powder$3.00
Nuts (optional)$6.00
Semi-sweet chocolate chips$3.00
Fresh cranberries$3.00
Apples$2.00
Ground cinnamon$2.00
Ground nutmeg$2.00
Ground ginger$2.00
Active dry yeast$2.00
Lemons$1.00
Oranges$1.00
Total Estimated Cost$56.00

Tips for Budget-Friendly Holiday Baking

  1. Buy in Bulk: Purchase larger quantities of flour, sugar, and other staples to save money.
  2. Use Seasonal Ingredients: Incorporate seasonal fruits and spices to enhance flavors without breaking the bank.
  3. Plan Ahead: Create a baking schedule to avoid last-minute purchases and ensure you have everything you need.
  4. Share the Joy: Consider baking in batches and sharing with friends and family, which can make the process more enjoyable and cost-effective.

With this essential ingredient list and budget in hand, you’re well on your way to a successful holiday baking season. Embrace the joy of creating delicious treats that will bring warmth and cheer to your home and those you love. Happy baking!

Start Buying Holiday Craft Supplies | Day 11 of 60 Day Holiday Prep for Thanksgiving and Christmas

Setting Up Basic Craft Supplies for Your 60-Day Holiday Prep

The holiday season is just around the corner, and now is the perfect time to start preparing for all those festive DIY projects! Whether you’re planning to create handmade gifts, decorations, or cards, having the right craft supplies on hand will make your holiday prep a breeze. Today marks the beginning of your 60-day countdown to the holidays, so let’s dive into the essential craft supplies you’ll need and some simple DIY projects that even the least crafty among us can tackle.

Essential Holiday Craft Supplies

Before you hit the stores or shop online, here’s a comprehensive list of basic craft supplies to gather:

  1. Paper Supplies:
  • Cardstock (various colors)
  • Wrapping paper
  • Tissue paper
  • Craft paper (for scrapbooking)
  1. Adhesives:
  • Glue sticks
  • Liquid glue
  • Double-sided tape
  • Hot glue gun and glue sticks
  1. Tools:
  • Scissors
  • Craft knife
  • Ruler
  • Cutting mat
  1. Decorative Supplies:
  • Ribbons and twine
  • Stickers and embellishments
  • Washi tape
  • Glitter and sequins
  1. Painting Supplies:
  • Acrylic paints
  • Paintbrushes (various sizes)
  • Sponges for texture
  1. Fabric and Textiles:
  • Felt sheets
  • Cotton fabric (for sewing projects)
  • Embroidery thread
  1. Miscellaneous:
  • Holiday-themed stencils
  • Craft foam sheets
  • Beads and buttons
  • Holiday-themed cookie cutters

Simple DIY Projects for Non-Crafters

If you’re not particularly crafty but still want to create something beautiful for the holidays, here are three simple DIY projects that require minimal skills but yield stunning results:

  1. Holiday Mason Jar Gifts:
  • Supplies Needed: Mason jars, hot cocoa mix, marshmallows, chocolate chips, ribbons.
  • Instructions: Layer the hot cocoa mix, marshmallows, and chocolate chips in the mason jar. Seal it and decorate the jar with a festive ribbon. Attach a tag with instructions for making the perfect cup of cocoa!
  1. DIY Holiday Ornaments:
  • Supplies Needed: Clear glass or plastic ornaments, paint, glitter, and ribbon.
  • Instructions: Remove the top of the ornament and pour in a small amount of paint. Swirl it around to coat the inside, then add glitter for extra sparkle. Replace the top and hang a ribbon for a beautiful ornament that adds a personal touch to your tree.
  1. Personalized Gift Tags:
  • Supplies Needed: Cardstock, scissors, hole punch, and decorative elements (stickers, stamps).
  • Instructions: Cut the cardstock into tag shapes and punch a hole at the top. Decorate with stickers or stamps, and write the recipient’s name on each tag. These personalized touches will make your gifts stand out!

Conclusion

With your basic craft supplies gathered and a few simple projects in mind, you’re well on your way to a festive and creative holiday season. Remember, the key to enjoying your holiday prep is to have fun and let your creativity shine. So, grab your shopping list, head out to gather your supplies, and get ready to craft your way through the holidays! Happy crafting!

Below is a Checklist you can use for shopping:

Holiday Craft Supply Essential Deluxe Checklist

Use this handy checklist to ensure you have all the essential supplies for your holiday crafting projects.

  • [ ] Cardstock (various colors)
  • [ ] Wrapping paper
  • [ ] Tissue paper
  • [ ] Craft paper (for scrapbooking)
  • [ ] Holiday-themed scrapbook paper
  • [ ] Glue sticks
  • [ ] Liquid glue
  • [ ] Double-sided tape
  • [ ] Hot glue gun
  • [ ] Hot glue sticks
  • [ ] Scissors
  • [ ] Craft knife
  • [ ] Ruler
  • [ ] Cutting mat
  • [ ] Hole punch
  • [ ] Ribbons (various colors and widths)
  • [ ] Twine
  • [ ] Stickers (holiday-themed)
  • [ ] Washi tape
  • [ ] Glitter
  • [ ] Sequins
  • [ ] Beads
  • [ ] Acrylic paints (various colors)
  • [ ] Paintbrushes (various sizes)
  • [ ] Sponges (for texture)
  • [ ] Felt sheets (various colors)
  • [ ] Cotton fabric (for sewing projects)
  • [ ] Embroidery thread
  • [ ] Fabric scissors
  • [ ] Holiday-themed stencils
  • [ ] Craft foam sheets
  • [ ] Holiday-themed cookie cutters
  • [ ] Clear plastic or glass ornaments (for DIY projects)
  • [ ] Mason jars (for gift projects)
  • [ ] Craft storage bins or boxes
  • [ ] Ziplock bags (for small items)
  • [ ] Labels (for organizing supplies)
  • [ ] Notebooks or sketchpads (for planning projects)
  • [ ] Markers or pens (for writing and decorating)
  • [ ] Holiday-themed templates or printables (for inspiration)

Feel free to print this checklist or keep it handy on your phone as you shop for your holiday crafting supplies. Happy crafting!

DIY: Create Your Advent’s Calendar | Day 10 of 60 | Preparing for the Holidays

Advents Calendars don’t have to be filled with chocolate or bought in the store

Crafting Your Own Advent Calendar: Creative Ideas and Gift Suggestions

The holiday season is a time for joy, celebration, and anticipation, and what better way to count down the days to Christmas than with a DIY advent calendar? While traditional calendars often feature chocolates or candies, you can get creative and design one that suits your style and preferences. Whether you choose to use envelopes, boxes, or bags, the possibilities are endless! Here’s how to create your own advent calendar and some thoughtful gift ideas to include.

1. Creating an Advent Calendar with Envelopes

Using envelopes is a simple and versatile way to create an advent calendar. Here’s how to do it:

Materials Needed:

  • 24 small envelopes (you can decorate them with festive designs)
  • String or ribbon for hanging
  • Clothespins or tape
  • Small gifts or notes to fill the envelopes

Instructions:

  1. Decorate the Envelopes: Use markers, stickers, or washi tape to personalize each envelope. Number them from 1 to 24 for the days leading up to Christmas.
  2. Fill the Envelopes: Instead of sweets, consider filling each envelope with small gifts, notes, or even cash. For example, I created an advent calendar filled with money to spend after Christmas on holiday shopping. This gives me extra spending money for post-holiday sales and avoids the temptation of extra chocolates or candies in the house.
  3. Display Your Calendar: Hang the envelopes on a string or ribbon using clothespins, or arrange them on a shelf or table for easy access.

2. Creating an Advent Calendar with Boxes

If you prefer a more structured approach, using small boxes can be a fun way to create your advent calendar.

Materials Needed:

  • 24 small boxes (you can use gift boxes, matchboxes, or even repurpose small containers)
  • Decorative paper or wrapping for the boxes
  • Number stickers or tags
  • Small gifts or treats to fill the boxes

Instructions:

  1. Wrap the Boxes: Decorate each box with festive wrapping paper or paint. Number them from 1 to 24.
  2. Fill the Boxes: Choose a variety of small gifts, such as mini candles, ornaments, or beauty products. You can also include handwritten notes with fun activities or experiences to enjoy during the holiday season.
  3. Arrange the Boxes: Stack the boxes in a pyramid shape, line them up on a shelf, or create a festive display on your dining table.

3. Creating an Advent Calendar with Bags

Using small bags is another creative option for your advent calendar. This method is especially great for a more casual and playful look.

Materials Needed:

  • 24 small bags (paper, fabric, or burlap bags work well)
  • Twine or string for hanging
  • Number tags or stickers
  • Fun gifts or surprises to fill the bags

Instructions:

  1. Decorate the Bags: Use tags or stickers to number each bag from 1 to 24. You can also personalize them with festive designs or names.
  2. Fill the Bags: Consider including a mix of small gifts, such as tea bags, handmade coupons for activities, or even a few holiday-themed items like ornaments or decorations.
  3. Display the Bags: Hang the bags on a string or arrange them in a basket for a charming display.

Creating your own advent calendar is a wonderful way to add a personal touch to your holiday season. Whether you choose to use envelopes, boxes, or bags, the key is to fill them with thoughtful gifts. By customizing your advent calendar, you can make the countdown to Christmas even more special, all while avoiding the extra calories that often come with traditional calendars. So gather your materials, get creative, and enjoy the process of crafting a unique advent calendar that reflects your style and spirit! Happy holidays!

Start Shopping for Gifts | Day 8 of 60 | Health Storey Holiday Prep for Thanksgiving and Christmas

10 Tips and Tricks for Staying Focused on Your Christmas Gift List and Budget

The holiday season is just around the corner, and with it comes the joy of gift-giving! However, the excitement can quickly turn into stress if you’re not careful. To help you navigate the bustling world of Christmas shopping this November, Health-Storey has compiled ten essential tips and tricks to keep you focused on your gift list and budget. Let’s make this holiday season merry and bright without breaking the bank!

Gifts do not need to be complicated. A tray or bag of Holiday cookies is an excellent gift for every one.

1. Create a Detailed Gift List

Start by making a comprehensive list. Include their interests, sizes, and any specific items they might like. This will not only help you stay organized but also prevent impulse buys that can derail your budget.

2. Set a Realistic Budget

Determine how much you can afford to spend on gifts this year. Break it down by person or category, and stick to this budget as you shop. Having a clear financial plan will help you avoid overspending and keep your holiday spirit intact. If you are not happy about this year’s budget, start making a plan for the 2026 holidays and focus your budget this year on a specific gift theme that is more modest.

3. Prioritize Your List

Identify who is most important to you and prioritize your gift list accordingly. Focus on finding meaningful gifts for those at the top of your list first, and then work your way down. This ensures that you allocate your budget wisely.

4. Take Advantage of Sales and Discounts

November is packed with sales events, including Black Friday and Cyber Monday. Keep an eye out for discounts on items on your list. Sign up for newsletters from your favorite retailers to receive alerts on special promotions and exclusive deals.

5. Shop Early

Avoid the last-minute rush by starting your shopping early in November. This not only gives you more time to find the perfect gifts but also allows you to spread out your spending over the month, making it easier to stick to your budget.

6. Use Cash or a Prepaid Card

To help control your spending, consider using cash or a prepaid card for your holiday shopping. This way, you can only spend what you’ve allocated, reducing the temptation to overspend with credit cards.

7. Limit Online Shopping Temptations

While online shopping is convenient, it can also lead to impulse purchases. Set specific times for online shopping and stick to your list. Avoid browsing aimlessly, as this can lead to unnecessary spending.

8. Get Creative with Gifts

Consider making homemade gifts or giving experiences instead of physical items. Handmade treats, personalized photo albums, or tickets to a local event can be thoughtful and budget-friendly alternatives that your loved ones will cherish.

9. Keep Track of Your Spending

As you shop, keep a running total of your expenses. This will help you stay aware of how much you’ve spent and how much you have left in your budget. Use a simple spreadsheet or Google Doc to keep track of how much you have spent and what you, have left for gifts.

10. Stay Flexible and Open-Minded

Sometimes, the perfect gift may not be what you initially envisioned. Stay open to alternatives and be willing to adjust your list if you find something that fits your budget and feels right. Flexibility can lead to delightful surprises!

With these ten tips and tricks in your holiday shopping toolkit, you’ll be well-equipped to tackle your Christmas gift list and budget with confidence. Remember, the true spirit of the season lies in the thought and love behind each gift, not the price tag. So, embrace the joy of giving, stay focused, and make this holiday season one to remember! Happy shopping!

Don’t forget to buy a Thanksgiving Gift for the Host of the Dinner!

Sample Baking Menu for Christmas| Day 7 of 60 | Holiday Prep for Thanksgiving and Christmas

Christmas Baking Menu for a Family of Four and Friends

The holiday season is the perfect time to gather in the kitchen and create delicious treats that bring joy to your family and friends. Spend today working on your bake menu for Christmas. If you don’t want to deal with the stress of picking things to bake, here’s a festive baking menu that includes a variety of sweet and savory options that we will share over the next two months to ensure there’s something for everyone to enjoy!

1. Classic Gingerbread Cookies or Bread for a Gingerbread House

  • Description: Spiced cookies are a holiday favorite! Decorate them with royal icing and colorful sprinkles for a fun family activity.
  • Serving Suggestion: Serve with a warm cup of spiced cider or hot cocoa.

2. Apple Tarts

  • Description: A simple yet delightful treat made with apples and cookies.
  • Serving Suggestion: Top with whip cream or a scoop of ice cream.

3. EggNog French Toast

  • Description: Bread slices infused with eggnog flavor, topped with cinnamon and cream. These are perfect for holiday gatherings or just for your own festive breakfast.
  • Serving Suggestion: Garnish with a sprinkle of sugar cinnamon.

4. Cranberry Orange Bread

  • Description: A sweet and tangy quick bread that combines fresh cranberries and zesty orange. It’s perfect for breakfast or as a snack.
  • Serving Suggestion: Serve warm with a pat of butter or cream cheese.

5. Chocolate Chip Walnut Cookies

  • Description: A twist on the classic chocolate chip cookie, these include crunchy walnuts for added texture and flavor.
  • Serving Suggestion: Make them for gifts and save yourself one to make sure they taste O.K.

6. Mini Quiches

  • Description: Savory mini quiches filled with cheese, spinach, and your choice of vegetables. These are great for brunch or as appetizers.
  • Serving Suggestion: Serve warm with a cup of soup.

7. Holiday Fruitcake

  • Description: A traditional fruitcake packed with dried fruits, nuts, and spices. This rich cake is perfect for sharing and can be made ahead of time.
  • Serving Suggestion: Serve slices with a dollop of whipped cream or crumbled for ice cream.

8. Sugar Cookies with Pistaccio Icing

  • Description: Soft and buttery sugar cookies that are perfect for decorating. Use Pistachio icing to create festive designs and shapes.
  • Serving Suggestion: Host a cookie decorating party with family and friends!

9. Holiday Cinamon Buns

  • Description: Cinnamon Buns, topped with a chocolate cream cheese frosting.
  • Serving Suggestion: Serve with a scoop of vanilla ice cream.

10. Spiced Apple Cider Muffins

  • Description: Moist muffins made with spiced apple cider, perfect for breakfast or as a holiday gift.
  • Serving Suggestion: Serve warm with a sprinkle of cinnamon sugar on top.

This Christmas baking menu offers a delightful mix of sweet and savory treats that are sure to please your family and friends. Whether you’re hosting a holiday gathering or simply enjoying time in the kitchen, these recipes will help create lasting memories and delicious moments. Happy baking!

Guest Etiquette | Day 5 of 60 | Holiday Prep for Thanksgiving and Christmas

How Long Should You Stay as a Guest During the Holidays?

The holiday season is a time for family, friends, and celebration. But how long is it appropriate to stay as a guest at someone’s house during Thanksgiving and Christmas? Let’s break it down!

How Long is Too Long?

When visiting during the holidays, 2 to 4 hours is generally a good timeframe for a daytime visit. If you arrive for dinner, staying until dessert is served is usually acceptable. Leaving too soon, like right after the meal, can seem rude.

If you’re not staying overnight, aim to leave by 9 or 10 PM. This way, you won’t overstay your welcome, and your hosts can wind down their evening.

Guest Etiquette for the Holidays

As a guest, you should:

  • Help out: Offer to assist with setting the table or cleaning up.
  • Be polite: Thank your hosts for their hospitality.
  • Engage: Participate in conversations and activities.

As a host, you should:

  • Make everyone comfortable: Ensure guests have a place to sit and feel welcome.
  • Provide food and drinks: Keep the snacks and beverages flowing.
  • Plan activities: Have games or entertainment ready to keep the mood lively.

How Long Should You Stay?

For holiday gatherings, 3 to 5 hours is a good rule of thumb. This allows you to enjoy the festivities without feeling rushed or overstaying your welcome.

Gift Ideas for Your Hosts

Bringing a small gift is a thoughtful gesture. Here are some ideas:

  • For family: A homemade dish or dessert.
  • For friends: A bottle of wine or a festive candle.
  • For overnight stays: A cozy blanket or a fun board game.

Music Playlist for the Holidays

A good music playlist can set the mood for your gathering. Aim for a 2 to 3-hour playlist to cover the duration of your visit. Start playing it about 30 minutes before guests arrive to create a welcoming atmosphere.

Navigating holiday visits can be tricky, but with these guidelines, you can enjoy your time with family and friends without any awkward moments. Remember, the key is to be respectful and considerate of your hosts while making the most of the festive season!

Here is a playlist on YouTube that is 11 hours long and will get you through Christmas Day!